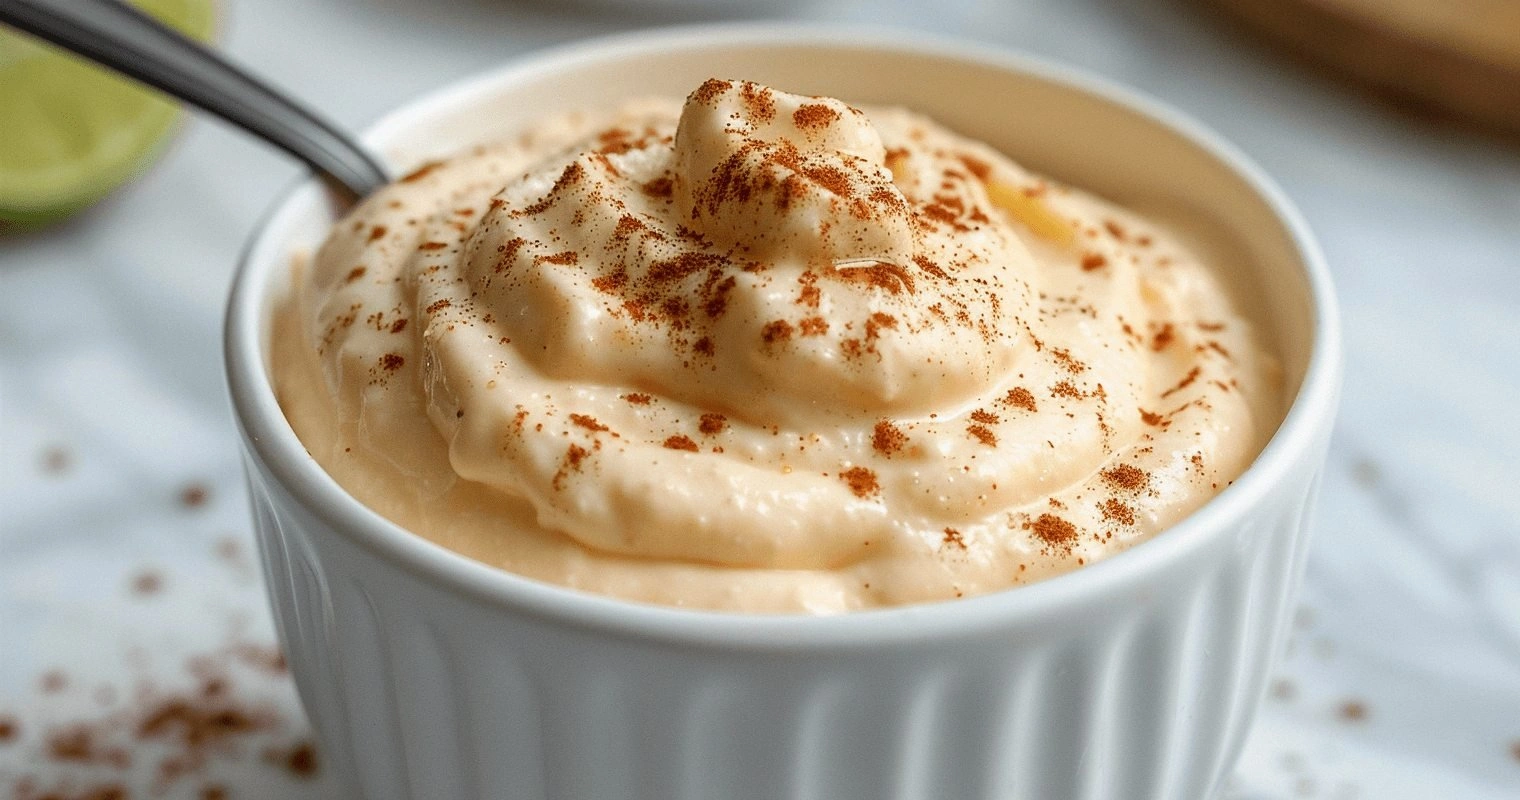
Picture this: I’m standing in a dimly lit kitchen, the smell of burnt toast curling up from the toaster, a half‑finished batch of pancakes on the counter, and my friend’s voice echoing, “You need to try a real topping.” I stared at the burnt crumbs, the pancake batter still slick on the pan, and thought, “What if I could turn this mess into a masterpiece?” I didn’t even need a fancy kitchen gadget. All I needed was a can of coconut milk, a splash of maple syrup, and a few simple spices. The result? A cloud of whipped coconut cream that’s smoother than silk, sweeter than a sugar rush, and so versatile that it can dress desserts, coffee, or even a humble bowl of oatmeal.
I’ve spent years chasing the perfect whipped topping, from the airy, dairy‑free cloud I made with aquafaba to the rich, buttery meringues that always fall flat. Every attempt ended with either a lumpy disaster or an overly sweet mess that made me question my culinary sanity. The moment I discovered the secret to whipping coconut milk into a velvety, airy cloud, I realized the culinary world had been missing a simple, yet game‑changing ingredient. This isn’t just another recipe; it’s a revelation that will change the way you think about dairy‑free toppings forever.
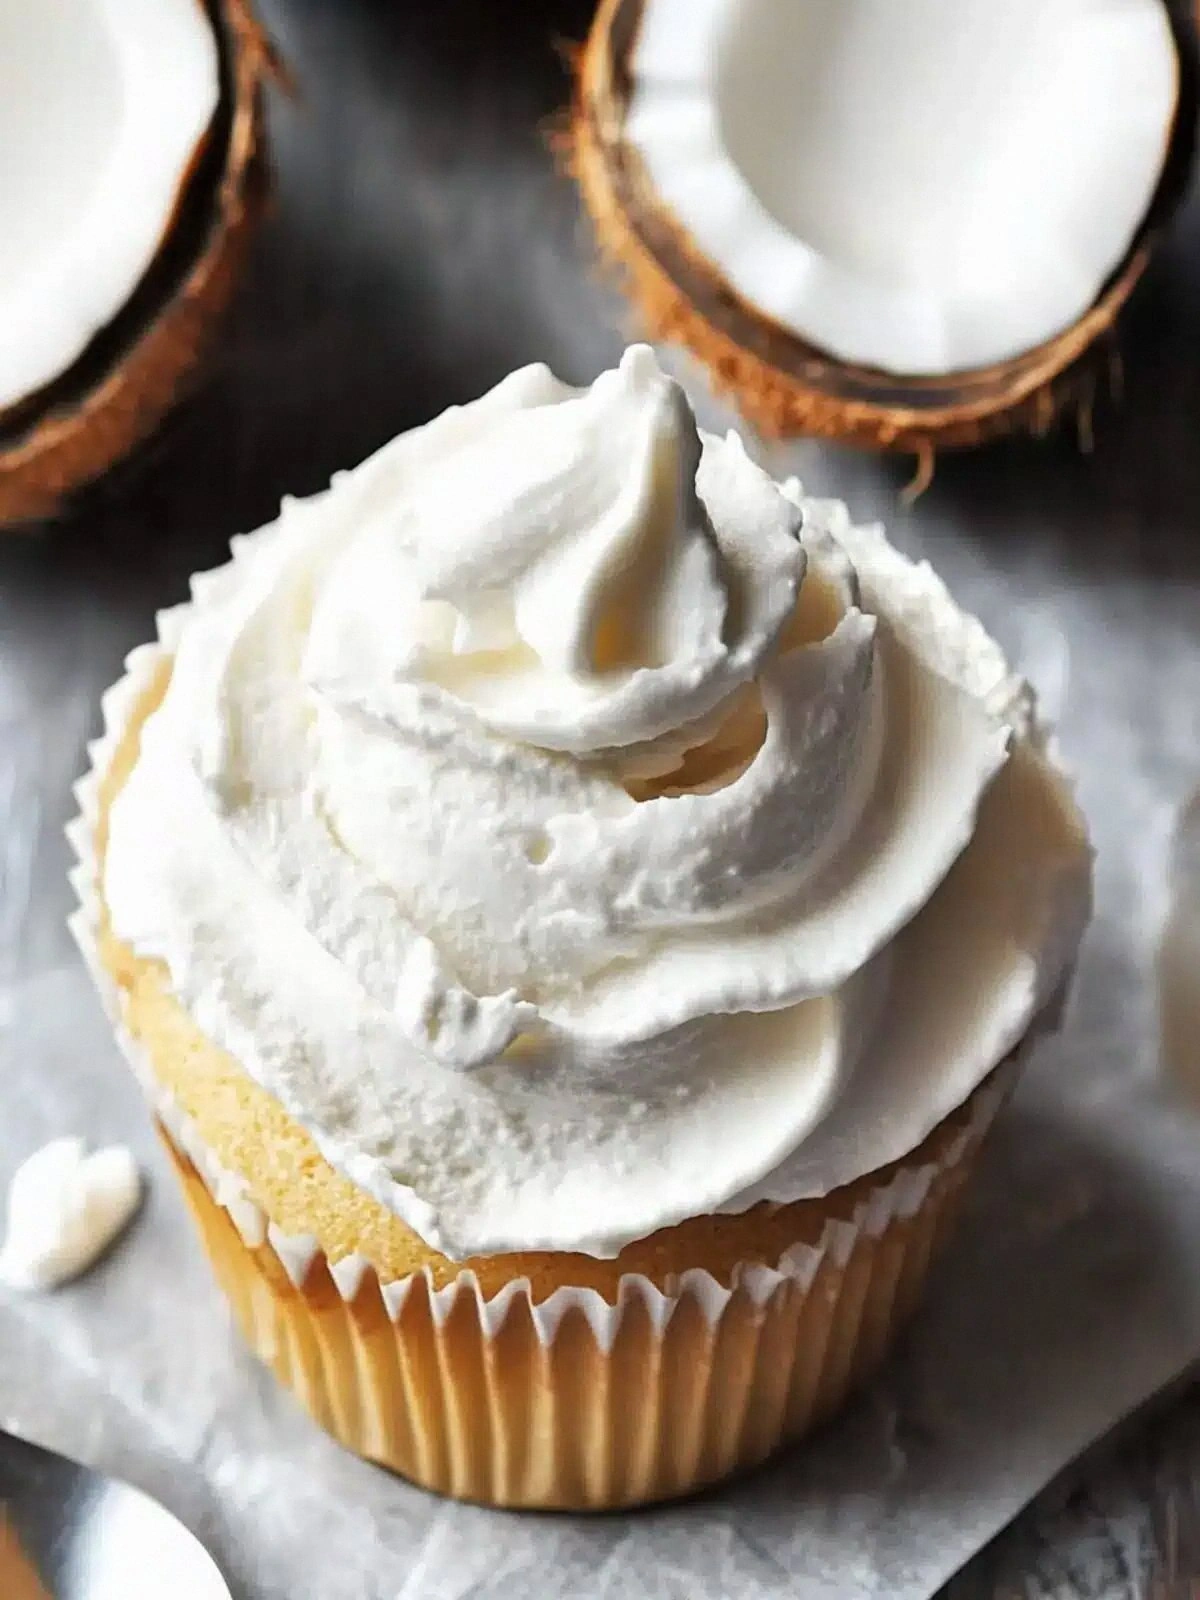
Imagine the first bite: a light, fluffy cloud of coconut that melts on your tongue, followed by a burst of sweet maple, a hint of vanilla, and a whisper of cocoa that lingers like a secret. The texture is airy yet dense enough to stay on top of a bowl of oatmeal or a cup of hot cocoa, while the flavor profile is a balanced dance of tropical sweetness and deep, earthy cocoa. It’s the kind of topping that turns a simple dish into a showstopper, the kind that makes you go, “I dare you to taste this and not go back for seconds.”
The secret? It’s not just the coconut milk; it’s the precise ratio of sweetener, the gentle whipping technique, and the subtle addition of spices that give it depth. I’ll walk you through every single step, from choosing the right can of coconut milk to achieving the perfect airy texture. By the end, you’ll wonder how you ever made a topping that wasn’t this luscious. Let me show you the magic that lies in a simple can of coconut milk.
What Makes This Version Stand Out
This whipped coconut cream is not just another airy topping; it’s a symphony of flavors and textures that sets it apart from every other recipe you’ve tried. Below are the key elements that make this version the ultimate dairy‑free topping.
- Taste: The combination of maple syrup, vanilla, and cocoa creates a layered flavor profile that is both sweet and slightly savory, leaving a lingering finish that’s hard to resist.
- Texture: The whipping technique locks in air, giving the cream a light, mousse‑like consistency that stays on top of desserts without melting away.
- Ingredient Quality: Using a premium, full‑fat coconut milk ensures a richer flavor and smoother mouthfeel compared to light or skim versions.
- Versatility: It can be used on everything from pancakes and waffles to coffee and smoothies, making it a pantry staple for any kitchen.
- Make‑Ahead Potential: Whipped coconut cream holds its shape for up to 24 hours in the fridge, so you can prep it ahead of time for busy mornings or parties.
- Simple Method: The recipe requires only a hand mixer or a whisk and a few minutes of effort, making it accessible to both beginners and seasoned cooks.
Alright, let’s break down exactly what goes into this masterpiece…
Inside the Ingredient List
The Flavor Base
At the heart of this whipped coconut cream is a can of full‑fat coconut milk or coconut cream. This ingredient provides the creamy, tropical foundation that carries all the other flavors. If you use coconut cream, the result will be slightly richer and denser, perfect for desserts that need a more substantial topping. Skipping this step would leave you with a watery, underwhelming base that fails to hold its structure.
The Sweetener
Maple syrup is the sweetener of choice because it adds a natural, caramel‑like sweetness that complements the coconut’s tropical notes. It also introduces subtle vanilla undertones that enhance the overall flavor profile. If you prefer a sweeter finish, you can substitute a teaspoon of agave nectar or honey, but be aware that honey may introduce a floral note that shifts the balance.
The Aroma Enhancers
Vanilla extract and fruit extracts (such as raspberry, strawberry, or mango) are added to elevate the aroma and add depth. Vanilla brings a warm, comforting scent, while fruit extracts introduce a fresh, bright note that can transform the topping’s personality. If you’re experimenting, try a splash of almond extract for a nutty twist. Skipping these extracts will make the topping taste flat and one‑dimensional.
The Texture Crew
Cocoa powder and ground spices (a blend of cinnamon, nutmeg, and cardamom) work together to create a complex flavor profile and a slightly gritty texture that adds a pleasant bite. Cocoa powder also gives the cream a subtle chocolate undertone, while the spices bring warmth and depth. If you omit the spices, the topping will taste like plain coconut, lacking the depth that makes it unforgettable.
Everything’s prepped? Good. Let’s get into the real action…
The Method — Step by Step
- Step 1: Chill Your Equipment – Before you start, place your mixing bowl and whisk or beaters in the freezer for at least 10 minutes. Cold equipment helps the coconut milk whip faster and keeps the mixture airy. If you’re short on time, you can skip this step, but the final texture will be slightly denser.
- Step 2: Pour the Coconut Milk – Carefully pour the entire can of coconut milk or coconut cream into the chilled bowl. The liquid should be thick and creamy; if it’s too runny, let it sit at room temperature for a few minutes to thicken.
- Step 3: Add Sweetener and Extracts – Stir in 2 tablespoons of maple syrup, 1 teaspoon of vanilla extract, and 1 teaspoon of fruit extract of your choice. Mix gently with a spoon to combine the flavors before whipping.
- Step 4: Begin Whipping – Start whipping on medium speed. The mixture will begin to thicken after about 2 minutes, forming soft peaks. Keep an eye on it; you don’t want to overwhip.
- Step 5: Add Cocoa and Spices – Once the mixture is thick, fold in 2 tablespoons of cocoa powder and 1 teaspoon of ground spices. Use a spatula to gently fold, ensuring the powders are fully incorporated without deflating the foam.
- Step 6: Whip to Firm Peaks – Increase the speed to high and whip for another 3-4 minutes until the mixture holds stiff peaks. This is the moment of truth: the texture should feel light, airy, and hold its shape when you lift the whisk.
- Step 7: Check the Texture – Hold the whisk above the mixture. The peaks should stand upright and not droop when you lift the whisk. If they droop, whip for an additional minute.
- Step 8: Taste Test – Give the whipped coconut cream a quick taste. The flavor should be balanced: sweet, coconutty, with a hint of cocoa and spices. If it’s too sweet, add a pinch of sea salt to balance the flavors.
- Step 9: Chill and Store – Transfer the whipped coconut cream to an airtight container and refrigerate for at least 30 minutes to set. The chill will firm up the texture, making it even more luxurious.
- Step 10: Serve and Enjoy – Dollop the whipped coconut cream onto your favorite dish—pancakes, oatmeal, or a bowl of hot cocoa—and enjoy the airy, flavorful cloud that elevates every bite.
That’s it— you did it. But hold on, I’ve got a few more tricks that will take this to another level…
Insider Tricks for Flawless Results
The Temperature Rule Nobody Follows
Cold equipment and cold coconut milk are the secret to achieving the perfect airy texture. When the mixture is chilled, the fat in the coconut milk solidifies slightly, allowing the whisk to trap more air. I once whipped a batch at room temperature and ended up with a heavy, clumpy mess. Keep your bowl and whisk in the fridge, and the result will always be light and fluffy.
Why Your Nose Knows Best
During the whipping process, the aroma of maple syrup and vanilla will intensify. If the scent is flat or underwhelming, it’s a sign you need to add more sweetener or extracts. Trust your nose; it’s the most reliable flavor gauge. A well‑aromated topping will taste richer and more complex.
The 5-Minute Rest That Changes Everything
After whipping, let the mixture rest for 5 minutes before serving. This short pause allows the foam to set and the flavors to meld together. If you serve it immediately, the peaks may collapse, and the texture will be less stable. A brief rest is the difference between a cloud and a puddle.
Use a Stainless Steel Bowl
Stainless steel is non‑reactive and keeps the mixture cold longer than plastic. It also provides a stable surface for the whisk to glide over, reducing friction and helping the mixture maintain its airy structure. If you’re using a glass bowl, make sure it’s chilled to the same temperature.
Keep the Spices Fresh
Ground spices lose potency over time. For maximum flavor, grind your own cinnamon, nutmeg, and cardamom just before whipping. If you’re using pre‑ground spices, add a pinch of fresh pepper for an unexpected kick that balances the sweetness.
Creative Twists and Variations
This recipe is a playground. Here are some of my favorite ways to switch things up:
Chocolate‑Infused Delight
Swap the cocoa powder for a tablespoon of melted dark chocolate and whisk until smooth. The result is a richer, chocolatey version that pairs perfectly with chocolate pancakes or brownies.
Spiced Pumpkin Topping
Add 1 teaspoon of pumpkin puree and a pinch of cinnamon to the mix. This variation is ideal for autumn desserts or a cozy cup of hot chocolate on a chilly evening.
Berry Burst
Replace the fruit extract with fresh berries, pulsed in a blender, and fold into the whipped mixture. The topping gains a natural sweetness and a pop of color that’s perfect for summer breakfasts.
Minty Fresh
Add a few drops of peppermint extract to the mix. This minty version is refreshing and pairs wonderfully with chocolate or caramel desserts.
Coconut‑Almond Fusion
Stir in 1 tablespoon of almond butter and a pinch of almond extract. The nutty flavor complements the coconut, creating a layered taste that’s both exotic and comforting.
Herbal Twist
Incorporate a splash of fresh lemon zest and a pinch of dried basil. The citrusy brightness and herbal undertones provide an unexpected but delightful contrast to the sweet base.
Storing and Bringing It Back to Life
Fridge Storage
Store the whipped coconut cream in an airtight container in the refrigerator for up to 24 hours. The cooler temperature helps maintain the airy texture. Before serving, give it a quick stir to re‑introduce any settled air.
Freezer Friendly
You can freeze the topping in a freezer‑safe container for up to 3 months. Thaw overnight in the fridge and whisk briefly before using to restore the lightness. This is perfect for meal prep or parties.
Best Reheating Method
To revive a chilled or frozen batch, place it in a bowl over a pot of simmering water (a double boiler). Stir gently until it reaches the desired consistency. Adding a tiny splash of water before reheating steams the cream back to perfection, preventing it from drying out.