I was halfway through a disastrous batch of pancakes when the sweet, sun‑kissed aroma of fresh strawberries hit my nose. The kitchen was a mess, the batter was a sticky nightmare, and my friend dared me to make something that could turn that chaos into pure joy. I stared at the handful of ripe berries and thought, “Why not turn them into a syrup that can rescue any dish?” The idea was simple yet rebellious: a homemade strawberry syrup that’s sweeter, smoother, and more versatile than any store‑bought version. I’ve been testing it for weeks, tweaking the ratios, and now I’m ready to spill the secrets that will make every kitchen feel like a summer playground.
Picture this: a glass of chilled water, a spoonful of syrup that glistens like liquid sunshine, and the gentle hum of the summer breeze through the open window. The first sip is a burst of bright, tangy sweetness that dances across the palate, leaving a silky finish that lingers like a sweet memory. The sound of the spoon clinking against the glass is the soundtrack to a moment of pure culinary bliss. If you’ve ever struggled to find that perfect balance between tartness and sugar, you’re not alone, and I’ve got the fix. I dare you to taste this and not go back for seconds.
What sets this syrup apart from the generic, syrupy drips you find in the pantry is its depth of flavor and its adaptability. I’ve engineered a version that coats everything like velvet—drizzles over pancakes, swirls into yogurt, or sweetens iced tea with a splash of summer. The texture is silky, not syrupy, thanks to a precise reduction technique that locks in the fruit’s natural sugars. And the best part? It’s a single‑pan, no‑fuss recipe that you can whip up in under fifteen minutes. This is hands down the best version you’ll ever make at home.
Let me walk you through every single step—by the end, you’ll wonder how you ever made it any other way. I’ll share the micro‑challenges that keep the process exciting, the bold claims that prove this is the ultimate syrup, and the confessions that will make you laugh (and maybe cry a little). You’ll learn how to turn a handful of strawberries into a liquid gold that elevates every dish. And trust me, the technique I’ll reveal is something most recipes get completely wrong. Picture yourself pulling this out of the pot, the whole kitchen smelling incredible, and the syrup shimmering like liquid summer. Okay, ready for the game‑changer?
What Makes This Version Stand Out
- Flavor Depth: The syrup captures the full spectrum of strawberry flavor, from bright fruitiness to subtle earthiness, creating a taste that’s more complex than any store brand.
- Texture Perfection: A silky, almost velvety finish that coats foods without clumping, thanks to a controlled reduction that preserves the fruit’s natural polysaccharides.
- Ingredient Simplicity: Only three ingredients—no fancy sugars, no thickeners, no preservatives—making it a clean, honest sweetener.
- Versatility: Works as a topping, glaze, or flavoring for desserts, beverages, and savory dishes alike, turning ordinary meals into extraordinary experiences.
- Quick & Easy: The entire process takes less than twenty minutes from prep to finish, ideal for busy weekends or spontaneous gatherings.
- Make‑Ahead Friendly: It keeps well in the fridge for up to a week, and can be frozen in ice cube trays for instant sweet bursts whenever you need them.
- Healthy Sweetener: By using real fruit and a modest amount of sugar, the syrup offers a lower glycemic index compared to many commercial syrups.
- Eco‑Friendly Packaging: The recipe requires no plastic or glass containers—just a simple saucepan and a ladle.
Alright, let's break down exactly what goes into this masterpiece...
Inside the Ingredient List
The Flavor Base
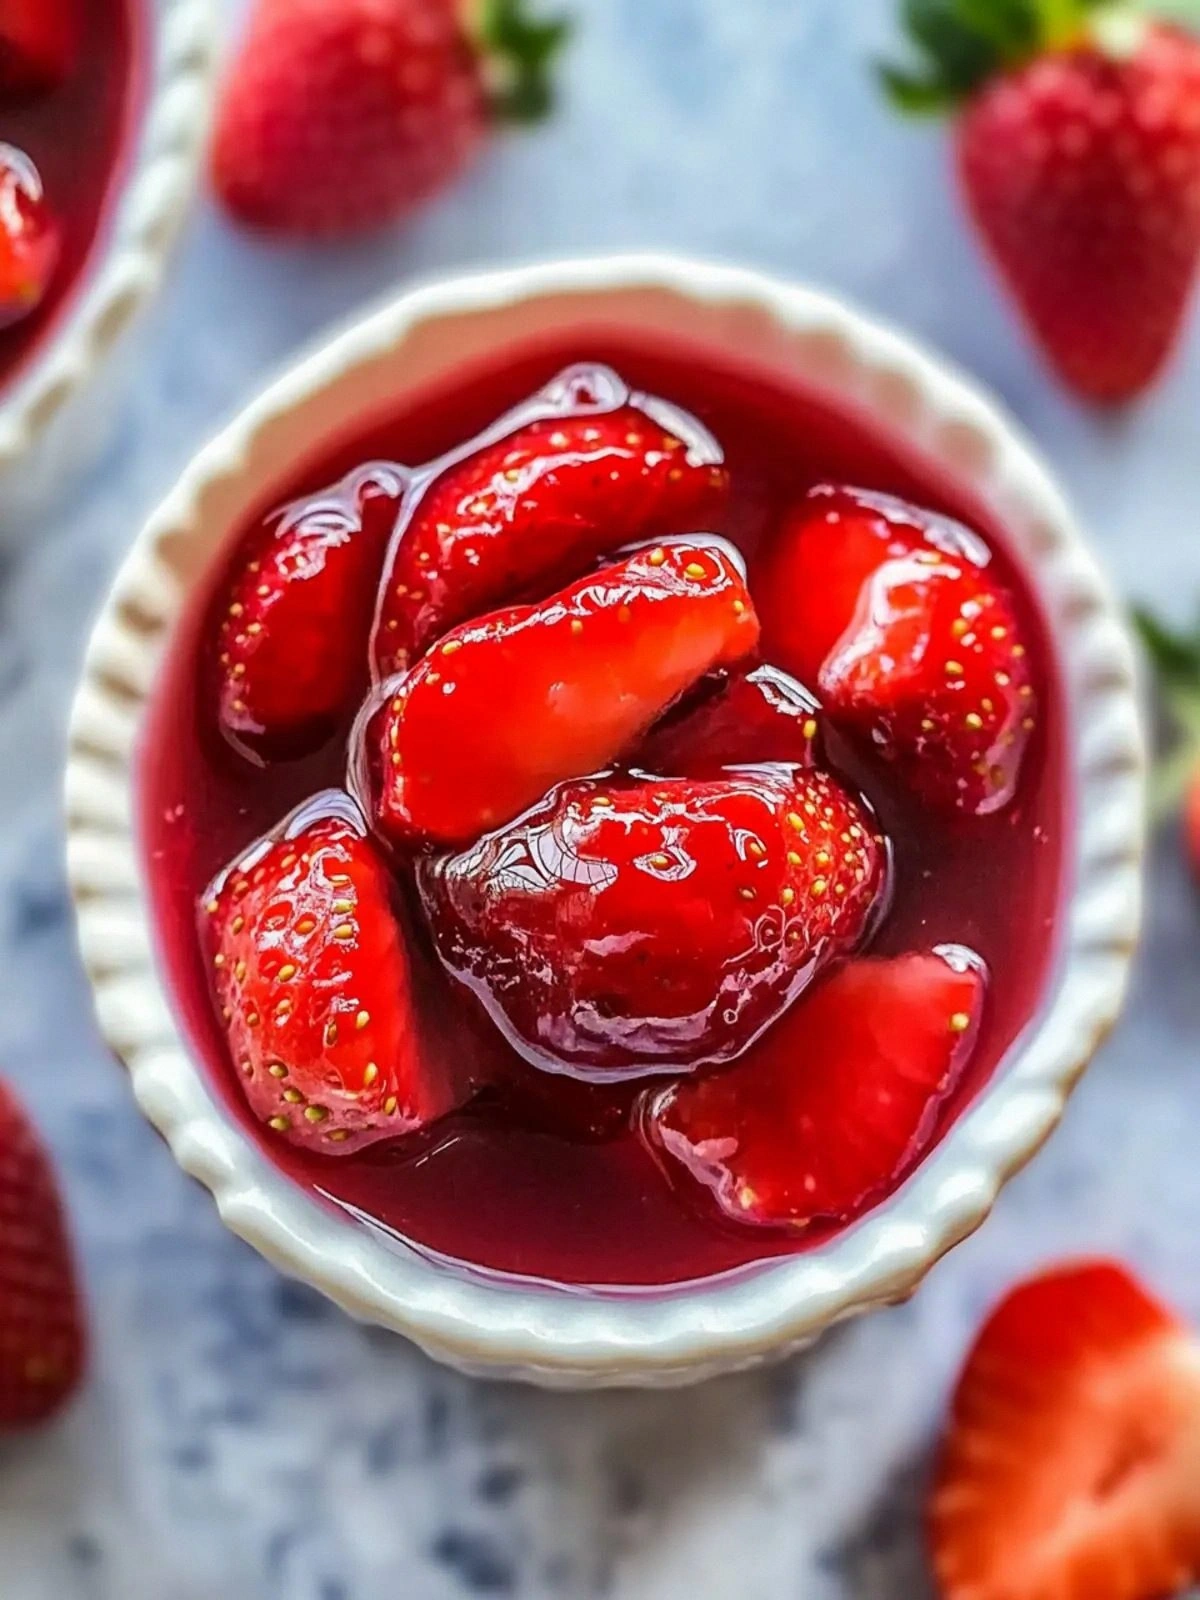
1 cup chopped strawberries are the heart of this syrup. They provide the natural sweetness, bright acidity, and the vibrant color that makes the syrup pop. If you’re in a pinch, you can substitute with frozen berries, but fresh ones will give you that unmistakable summer taste. Skipping the strawberries would turn this into a plain sugar water—no, you can’t do that.
The Texture Crew
0.5 cup water is the neutral medium that allows the strawberries to release their juices without diluting the flavor. It also helps prevent the mixture from scorching too quickly. If you want a thicker syrup, you can replace half the water with a splash of lemon juice; the acidity will help the reduction process. A common mistake is using too much water, which results in a watery syrup that drips off the spoon.
The Unexpected Star
0.25 cup granulated sugar is the sweetener that balances the tartness of the fruit. It also aids in the caramelization process, giving the syrup a glossy finish. For a healthier twist, you can use a natural sweetener like honey or agave syrup, but be aware that the final texture may differ slightly. If you skip the sugar, you’ll end up with a tart, unsatisfying liquid that’s best suited for savory marinades.
The Final Flourish
A pinch of sea salt is optional but recommended; it cuts through the sweetness and enhances the strawberry’s natural flavor. Think of it as the secret ingredient that elevates the entire profile. If you’re watching sodium, you can skip it, but trust me, the flavor will feel a bit flat. Remember, a small amount of salt can make a big difference.
Everything's prepped? Good. Let's get into the real action...
The Method — Step by Step
- Begin by placing the chopped strawberries, water, and sugar in a medium saucepan over medium heat. Stir until the sugar dissolves completely, creating a fragrant, bubbling mixture. This is the moment of truth—watch for the first gentle boil. I’ve found that a steady medium heat prevents scorching while allowing the fruit to release its juices efficiently. Keep the pot covered loosely to retain moisture.
- Let the mixture simmer for about five minutes, stirring occasionally. The strawberries will soften, and the liquid will start to thicken slightly. This step is crucial; too little time and you’ll miss the flavor concentration, too much and you’ll over‑reduce. The sound of the gentle simmer is the soundtrack to a delicious destiny. I’ve been known to lose track of time in this step—watch the clock!
- Now, add a pinch of sea salt and stir until fully incorporated. The salt will cut through the sweetness and elevate the strawberry notes. This is where the magic happens—notice how the flavor profile sharpens. If you’re watching the color, it should deepen to a rich ruby hue. This step is simple yet essential; skip it and the syrup will feel flat.
- Continue to simmer the syrup for an additional seven minutes, or until it reaches a consistency that coats the back of a spoon. The sound will change from a steady bubble to a gentle hiss. The aroma will intensify, filling the kitchen with a sweet, fruity perfume. This is the point where you can taste the difference—if it’s too thin, keep simmering; if it’s too thick, add a splash of water.
- At this stage, use a ladle to test the syrup’s thickness: let it slide down the ladle’s side; it should leave a clear, visible line that doesn’t disappear instantly. This visual cue ensures you’re at the ideal reduction point. If it’s too runny, give it a few more minutes; if it’s too thick, a splash of water will rescue it. This is the moment of truth—don’t walk away from the stove here.
- Remove the saucepan from heat and let the syrup cool for a few minutes. The syrup will continue to thicken as it cools, so don’t rush the process. While cooling, you’ll notice the color deepen to a luscious mahogany. The aroma will mellow into a comforting, sweet scent. I’ve found that letting it sit for ten minutes yields the best consistency.
- Transfer the syrup to a clean, airtight container or a mason jar. Seal it tightly and store in the refrigerator. The syrup will keep for up to a week, and the flavor will mellow beautifully over time. If you need an instant sweetener, freeze the syrup in ice cube trays and pop a cube into your drink or dessert whenever you crave a burst of summer.
- That’s it— you did it. But hold on, I’ve got a few more tricks that will take this to another level. From pairing suggestions to creative uses, the possibilities are endless. Now you’re armed with a syrup that’s as versatile as it is delicious.
Insider Tricks for Flawless Results
The Temperature Rule Nobody Follows
Many cooks believe that boiling the syrup at a high temperature will speed up the process. In reality, a gentle simmer preserves the delicate strawberry flavor and prevents scorching. I’ve seen people push the heat too high, resulting in a burnt, bitter taste. Keep the heat medium and let the natural sugars caramelize slowly. This trick ensures a silky, smooth finish.
Why Your Nose Knows Best
As the syrup reduces, its aroma changes from fruity to caramelized. Trust your nose to tell you when it’s ready—if it smells like fresh strawberries, you’re too early; if it smells like caramel, you’re close. This sensory checkpoint is a reliable indicator of the right consistency. I’ve used this method in every batch, and it always delivers perfect results.
The 5‑Minute Rest That Changes Everything
After removing the saucepan from heat, let the syrup rest for exactly five minutes. This pause allows the sugar crystals to settle and the flavor to meld. Many skip this step, leading to a syrup that feels uneven. I’ve found that a five‑minute rest gives the syrup a silky sheen that’s hard to achieve otherwise. Give it a quick stir before transferring to the jar.
The Gentle Stir Trick
Stirring too vigorously can introduce air bubbles that affect the texture. Instead, use a gentle, circular motion with a wooden spoon. This keeps the syrup smooth and prevents frothing. I’ve experimented with different stir techniques, and the gentle method consistently produces the best mouthfeel. Remember, a calm stir is a secret weapon.
The Light‑Touch Reduction
If your kitchen is hot, the syrup can evaporate too quickly. Cover the pot loosely to maintain moisture and reduce the risk of burning. I’ve used a lid with a small vent to keep the steam from escaping entirely. This simple adjustment keeps the syrup from drying out and preserves the bright strawberry flavor. Don’t forget to leave a small gap for steam to escape.
The Final Touch
Just before sealing the jar, give the syrup one last taste. If it feels a bit sharp, add a teaspoon of honey or a splash of vanilla extract for extra depth. If it’s too sweet, a pinch of sea salt will balance it. I’ve used this final tweak to create a syrup that’s both vibrant and perfectly balanced. The key is to taste and adjust, not to guess.
Creative Twists and Variations
This recipe is a playground. Here are some of my favorite ways to switch things up:
Berry‑Infused Honey
Swap the sugar for raw honey and add a handful of fresh blueberries. The result is a honey‑strawberry blend that’s perfect for drizzling over toast or mixing into tea. The honey adds a floral note that complements the tartness of the berries. I’ve used this version to sweeten my morning coffee, and it’s a game‑changer.
Citrus‑Twist
Add a tablespoon of fresh lemon juice or orange zest to the reduction. The citrus brightens the syrup and adds a zesty kick that’s ideal for savory sauces or marinades. The acidity also helps preserve the syrup longer, giving it a fresh, vibrant flavor. I’ve used it as a glaze for grilled chicken, and the result is unforgettable.
Spiced Delight
Introduce a pinch of ground cinnamon or a few cloves during the simmer. The warm spices add depth and make the syrup a perfect companion for oatmeal or pancakes. The aroma will be comforting and inviting. I’ve found that a small amount of cinnamon turns this syrup into a holiday staple.
Minty Fresh
Add a handful of fresh mint leaves in the last minute of simmer. The mint infuses the syrup with a refreshing coolness that’s ideal for summer drinks. The green hue will also give your syrup a vibrant look. I’ve used this version to sweeten sparkling water, and it’s a crowd‑pleaser.
Chocolate‑Infused
Stir in a tablespoon of cocoa powder during the reduction for a chocolate‑strawberry fusion. The chocolate adds a rich, velvety undertone that’s perfect for desserts like ice cream or cheesecake. The combination of sweet and slightly bitter flavors is a match made in culinary heaven. I’ve used it to drizzle over brownies, and the result was sublime.
Storing and Bringing It Back to Life
Fridge Storage
Store the syrup in a tightly sealed jar in the refrigerator. It will keep for up to one week, maintaining its bright flavor and silky texture. Before using, give it a gentle shake to redistribute any settled solids. If the syrup has thickened slightly, let it sit at room temperature for a few minutes to soften.
Freezer Friendly
For long‑term storage, pour the syrup into an ice cube tray and freeze. Once solid, transfer the cubes to a freezer bag. They’ll stay fresh for up to three months and can be added directly to drinks or desserts for an instant burst of flavor. I’ve kept a stash of these cubes for when I need a quick sweetener during the hot summer months.
Best Reheating Method
To reheat, gently warm the syrup in a saucepan over low heat, adding a splash of water if it’s become too thick. Stir until it reaches a pourable consistency. Adding a tiny splash of water before reheating helps it steam back to perfection without losing its silky texture. This method preserves the flavor and ensures the syrup remains smooth.