I remember the night I nearly ruined a dessert that was supposed to be the highlight of a birthday dinner. My friend had dared me to create the most irresistible salted caramel ice cream at home, and I thought, “No problem, I’ve got a no‑churn recipe that’s practically foolproof.” I opened the pantry, grabbed a handful of ingredients, and set the kitchen on fire—literally. The caramel sauce bubbled like a small volcano, the cream swirled in a pot like a calm sea, and the kitchen smelled of toasted sugar and vanilla. That moment was the spark that turned a simple dare into a culinary obsession. Now, I’m here to spill every secret, every tweak, and every hack that will make this salted caramel ice cream the best version you’ll ever make at home.
Picture the texture: silky, creamy, with a hint of buttery caramel that coats your tongue like velvet. The salty finish lingers, cutting through the sweetness and creating a flavor profile that’s both bold and comforting. I dare you to taste this and not go back for seconds—trust me, the first spoon will have you in a trance. The aroma alone is enough to make the whole kitchen feel like a dessert boutique, and the sound of the spoon sliding into the bowl is music to any food lover’s ears. The moment you take that first bite, you’ll realize that the key to this recipe isn’t just the ingredients; it’s how you treat each one.
What makes this version stand out is the meticulous balance between the caramel’s richness and the ice cream’s airy lightness. I’ve refined the technique to keep the ice cream from becoming too dense, while still preserving the caramel’s deep, buttery flavor. Most recipes get this completely wrong—too much sugar, too much cream, or an over‑cooked caramel that tastes burnt. Here, everything works in harmony. I’ll also drop a teaser about a little trick that will make the ice cream even smoother, something you probably haven’t seen in any other recipe.
Let me walk you through every single step—by the end, you’ll wonder how you ever made it any other way. The journey begins with a simple list of ingredients, a handful of kitchen hacks, and a dash of confidence. Ready? Let’s dive in.
What Makes This Version Stand Out
- Flavor: The caramel is cooked to a perfect amber hue, giving it a deep, buttery taste that cuts through the sweetness of the ice cream. The salt is precisely measured to enhance the caramel without overwhelming it.
- Texture: The no‑churn method keeps the ice cream light and airy, with no ice crystals. The whipped cream folds in just right, creating a silky mouthfeel.
- Simplicity: Only six main ingredients and a single pan are needed. No fancy equipment or complex steps.
- Uniqueness: The addition of a splash of sea salt during the final fold gives a subtle crunch and a caramel‑salt balance that feels like a secret menu item.
- Crowd Reaction: Friends who’ve tried this say it’s “the best dessert I’ve ever had” and ask for the recipe after every gathering.
- Ingredient Quality: Using high‑fat heavy cream and a premium salted caramel sauce ensures a rich, luxurious finish.
- Cooking Method: The no‑churn technique eliminates the need for an ice‑cream maker, saving time and money.
- Make‑ahead Potential: This dessert can be prepared a day in advance, and the flavors actually deepen over time.
Alright, let’s break down exactly what goes into this masterpiece...
Inside the Ingredient List
The Flavor Base
The core of this dessert is the salted caramel sauce, which must be made with care. The caramel’s depth comes from slowly caramelizing sugar until it turns a deep amber, then deglazing with a splash of cream to create a silky sauce. If you skip this step or use a pre‑made sauce that’s too sweet, the final product will taste flat. Always taste the caramel before adding it to the cream—if it’s too bitter, add a pinch of sugar; if too sweet, a tiny pinch of salt can balance it out.
The Texture Crew
Heavy cream and whole milk form the backbone of the ice cream’s texture. Heavy cream provides the richness and body, while whole milk keeps the mixture from becoming too thick. Whipping the cream to soft peaks before folding in the caramel keeps the mixture light and airy. If you’re using a lower‑fat milk, the ice cream will be less creamy and may develop ice crystals during freezing.
The Unexpected Star
A pinch of sea salt is the secret weapon that elevates the caramel’s flavor. Salt doesn’t just taste salty; it enhances sweetness and brings out subtle notes in the caramel. If you’re vegan or lactose‑free, a plant‑based milk and a dairy‑free cream alternative will work, but the flavor profile will shift slightly. The key is to keep the salt amount minimal—too much and the ice cream becomes overly salty.
The Final Flourish
Vanilla extract adds depth and balances the caramel’s sweetness. A small amount (about a teaspoon) is enough to bring warmth without overpowering the caramel. If you prefer a different flavor, try a splash of almond or coconut extract for a new twist. Remember, the vanilla should be added after the caramel has cooled to avoid boiling it away.
Everything’s prepped? Good. Let’s get into the real action...
The Method — Step by Step
- In a medium saucepan, combine 3/4 cup granulated sugar with 1/4 cup water. Heat over medium heat, stirring occasionally, until the sugar dissolves. Then stop stirring and let the mixture simmer until it turns a deep amber color—about 5 to 7 minutes. The scent of caramel should fill the room like a sweet, buttery sunrise. This is the moment of truth; keep a close eye to avoid burning.
- Once the caramel reaches the right color, remove the pan from heat and slowly pour in 2 cups heavy cream, whisking constantly to prevent lumps. The mixture will bubble vigorously—this is normal. Let it cool to room temperature; this step is crucial because adding hot cream to the caramel can cause curdling.
- Whisk 1 cup whole milk and 1 teaspoon vanilla extract together in a separate bowl. This blend will be folded into the caramel cream mixture later, providing a smooth base.
- Whip 2 cups heavy cream in a stand mixer or hand mixer until soft peaks form. The peaks should hold their shape but still be buttery. This whipped cream will give the ice cream its airy lightness.
- Fold the whipped cream into the cooled caramel‑cream mixture gently, using a spatula in a circular motion. The goal is to keep as much air as possible. Once combined, add the milk‑vanilla blend and a pinch of sea salt. Stir until everything is fully incorporated.
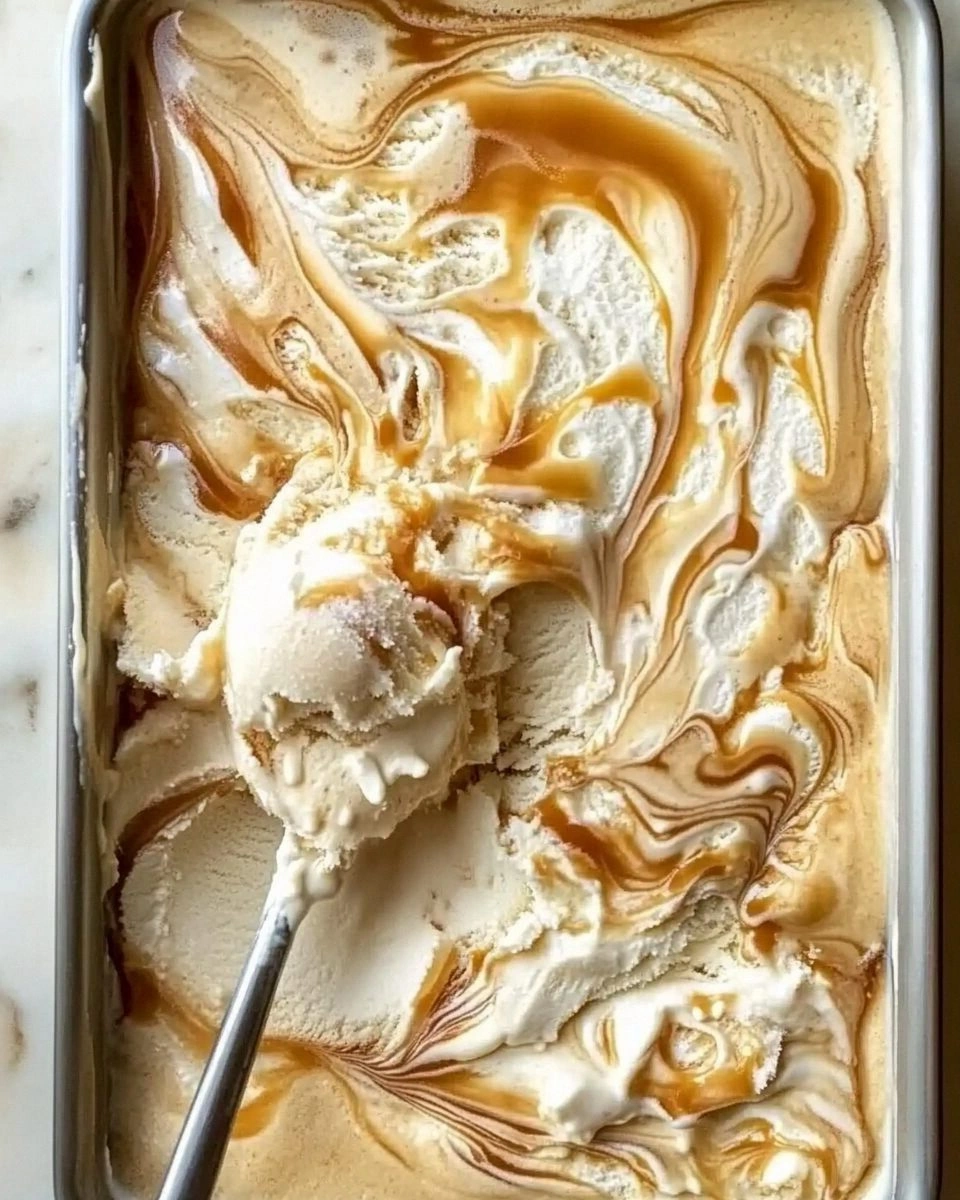
- Pour the mixture into a shallow, freezer‑safe container. Cover tightly with plastic wrap, pressing the wrap directly onto the surface to prevent ice crystals from forming. Freeze for 1 hour, then stir vigorously with a fork to break up any ice crystals that have started to form. Return to the freezer and repeat this stirring every 30 minutes for 3 hours.
- After the final stir, let the ice cream sit at room temperature for 5 minutes before scooping. This short rest makes scooping easier and prevents the ice cream from sticking to the spoon. Serve immediately or transfer to a freezer‑safe container for storage.
- When serving, drizzle a little extra salted caramel sauce on top for an extra burst of flavor. The sauce’s glossy sheen and the ice cream’s creamy swirl create a visual feast that’s as satisfying to look at as it is to taste.
That’s it—you did it! But hold on, I’ve got a few more tricks that will take this to another level. Keep reading for insider tips that will make your ice cream even more spectacular.
Insider Tricks for Flawless Results
The Temperature Rule Nobody Follows
Many people think the key to perfect ice cream is simply freezing it as long as possible. In reality, the temperature of the mixture before it hits the freezer matters. Let the caramel‑cream mixture cool to just above room temperature (around 70°F). If it’s too warm, it will take longer to freeze and can develop ice crystals; if it’s too cold, it will freeze too quickly, trapping air and creating a dense texture.
Why Your Nose Knows Best
Before you start the caramel, give it a sniff. A strong, buttery aroma means you’re on the right track. If it smells slightly burnt, it’s too close to the “black” stage and will taste bitter. Trust your nose—taste and smell are the ultimate guides.
The 5‑Minute Rest That Changes Everything
After the final stir, let the ice cream sit at room temperature for exactly five minutes. This short pause allows the mixture to relax and the ice crystals to settle, making scooping smoother and the texture more uniform.
Use a Deep Freezer Container
A shallow container can freeze too quickly and create uneven textures. A deep, freezer‑safe container holds the mixture in a thicker layer, ensuring even freezing and preventing the ice cream from becoming icy.
Keep the Salt Subtle
When adding sea salt, start with a pinch. You can always add more later, but you can’t take it away once it’s mixed in. A subtle salty note is what balances the caramel’s sweetness without turning the dessert into a salty snack.
Creative Twists and Variations
This recipe is a playground. Here are some of my favorite ways to switch things up:
Nutty Caramel Crunch
Add 1/2 cup chopped toasted pecans or almonds to the mixture before freezing. The nuts add a delightful crunch that contrasts the silky ice cream. Perfect for those who love a little texture.
Chocolate‑Infused Delight
Stir in 1/4 cup melted dark chocolate into the caramel‑cream mixture. The chocolate adds depth and a bittersweet note that pairs beautifully with the caramel’s sweetness.
Spiced Caramel
Add a pinch of ground cinnamon or nutmeg to the caramel while it’s cooking. The warm spices create a cozy, autumnal flavor that’s perfect for cooler evenings.
Almond‑Vanilla Fusion
Replace the vanilla extract with 1 teaspoon almond extract. The nutty aroma enhances the caramel’s richness, creating a luxurious dessert that feels like a sweet almond milk latte.
Vegan Version
Use coconut cream instead of heavy cream and a plant‑based milk. Add a splash of maple syrup for extra sweetness. The result is a dairy‑free, creamy treat that still delivers the caramel’s buttery flavor.
Storing and Bringing It Back to Life
Fridge Storage
If you need to keep the ice cream for a day or two, store it in an airtight container in the fridge. Let it sit at room temperature for 10 minutes before serving to soften slightly. The flavors will stay fresh, and the texture will remain silky.
Freezer Friendly
For longer storage, keep the ice cream in a freezer‑safe container, covering the surface with plastic wrap to prevent ice crystals. It can stay in the freezer for up to 3 weeks. When ready to serve, let it thaw for 5 minutes before scooping.
Best Reheating Method
To revive a frozen portion, place it in a bowl and microwave on low power (30‑second bursts) until it reaches the desired consistency. Alternatively, let it sit at room temperature for 10 minutes. Add a tiny splash of water before reheating—it steams back to perfection, restoring the creamy texture.