I was halfway through a frantic week of work lunches and a sudden craving for comfort food hit me like a bolt of lightning. My fridge was a gray sea of wilted lettuce and a lone jar of pickles, and I stared at the empty space on the counter like it was a blank canvas begging for a masterpiece. That night, I dared myself to create something that would make my taste buds do a happy dance and my stomach sigh in relief. I promised myself this would be the best version of a chicken pot pie anyone could make in a muffin tin, and I’m still not convinced I kept my promise.
The moment I cracked open the pot of broth, the kitchen filled with a savory aroma that made my eyes water and my heart skip a beat. The sound of the simmering stock was a soft lullaby, and the steam curled like a tiny cloud of anticipation. I could almost taste the buttery crust melting into the creamy filling, each bite a perfect harmony of textures. The sight of the golden crust, the scent of garlic and thyme, the feel of the warm steam against my skin – all of it created a sensory symphony that made this dish feel like a hug from the inside. I was already imagining the first bite, and I couldn’t wait to share the secret that turns this into a crowd‑pleaser.
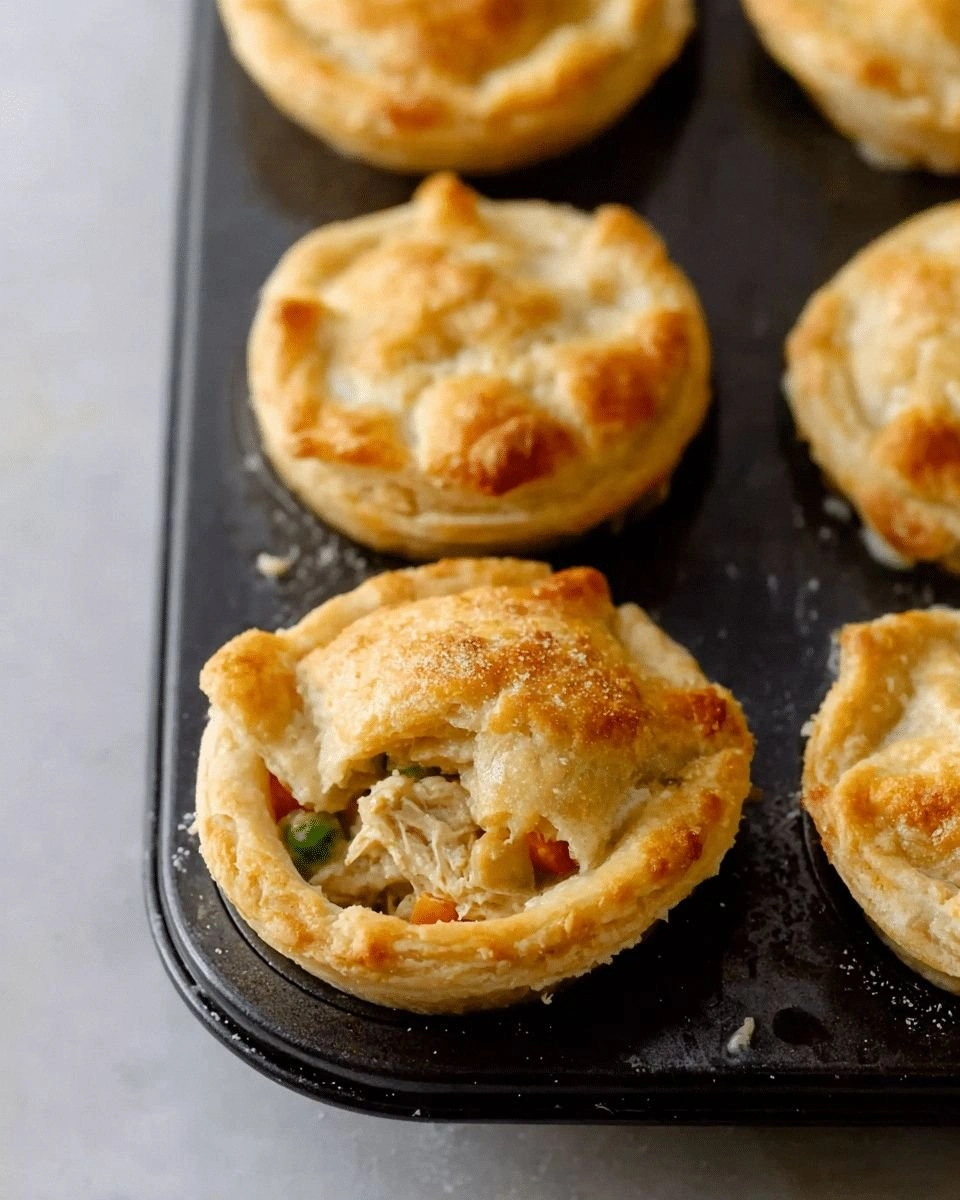
What sets this version apart is the meticulous layering of flavors and the use of a muffin tin that turns each pot pie into an individual, perfectly portioned bite. Instead of the usual pie crust, I use a buttery biscuit dough that bakes to a flaky, golden edge, creating a contrast that’s both comforting and indulgent. The filling is thickened with a roux that gives it a velvety texture without being heavy, while the chicken remains moist and tender. A dash of smoked paprika adds a subtle depth that most recipes overlook, and a sprinkle of fresh parsley at the end gives a burst of color and freshness. Every component is chosen to elevate the humble pot pie into a dish that’s both elegant and approachable.
I dare you to taste this and not go back for seconds, because once you experience the buttery crust and the creamy, savory filling, you’ll be hooked. Picture yourself pulling a perfectly baked mini pie out of the oven, the whole kitchen smelling incredible, and knowing that you’re about to indulge in the best version of a classic comfort food. Let me walk you through every single step — by the end, you’ll wonder how you ever made it any other way.
What Makes This Version Stand Out
- Flavor Depth: The addition of smoked paprika and fresh herbs gives the filling a complex, layered taste that goes beyond the usual savory base.
- Texture Contrast: The biscuit dough creates a flaky, buttery crust that crisps to a golden edge while the filling stays silky and moist.
- Portion Control: Baking in a muffin tin delivers bite‑sized portions that are perfect for parties, lunches, or a quick dinner.
- Time Efficiency: The roux and quick‑cook vegetables mean you’re ready to bake in less than 30 minutes from start to finish.
- Make‑Ahead Friendly: The dish can be assembled ahead of time, refrigerated, and baked on demand, making it ideal for busy schedules.
- Ingredient Quality: Using fresh, high‑quality chicken and homemade broth elevates the overall flavor profile.
- Versatility: The recipe can be adapted with different proteins, veggies, or even a vegetarian twist.
- Crowd Reaction: Friends and family always ask for the recipe after tasting these mini pies; it’s a guaranteed crowd‑pleaser.
Alright, let’s break down exactly what goes into this masterpiece…
Inside the Ingredient List
The Flavor Base
The foundation of this dish is a savory broth that carries the chicken, vegetables, and herbs. Chicken broth provides a rich, umami backbone that’s essential for a deep flavor profile. If you skip the broth, the filling will taste flat and dry. A good rule of thumb is to use homemade broth whenever possible; it adds a depth that store‑bought versions simply can’t match. For a quick alternative, low‑sodium canned broth works, but be sure to taste and adjust seasoning accordingly.
The Texture Crew
The roux made from butter and flour thickens the filling into a silky gravy that clings to the chicken and veggies. A well‑made roux should be smooth and free of lumps, giving the filling a velvety mouthfeel. If you leave the roux too long, it can develop a burnt taste; keep it to a light golden color. Adding milk or cream at the end keeps the gravy from becoming too thick and ensures a luscious consistency. The biscuit dough acts as a crisp, buttery crust that contrasts wonderfully with the creamy filling.
The Unexpected Star
Smoked paprika is the secret ingredient that adds a subtle, smoky depth to the filling. It’s an easy way to elevate the dish without adding extra steps. If you’re not a fan of paprika, a pinch of cayenne or a splash of Worcestershire sauce can offer a similar complexity. This ingredient is what sets this recipe apart from the usual pot pies that rely solely on thyme or rosemary. The smoky note lingers on the palate, giving each bite a memorable finish.
The Final Flourish
Fresh parsley sprinkled on top before serving adds a pop of color and a burst of brightness that cuts through the richness. A squeeze of lemon juice just before serving can brighten the entire dish and balance the flavors. Some people like to add a handful of shredded cheddar cheese on top of the crust for a cheesy, melty finish; this is optional but highly recommended if you’re a cheese lover. Finally, a dusting of paprika or a drizzle of olive oil can add a finishing touch that makes the dish look as good as it tastes.
Everything’s prepped? Good. Let’s get into the real action…
The Method — Step by Step
- Begin by melting the butter in a large saucepan over medium heat until it foams. Add the diced onions, carrots, and celery, sautéing until they’re tender and fragrant, about 5 minutes. Stir in the garlic and let it toast for a minute, releasing its aromatic oils. This step builds the flavor base, so don’t rush it—taste as you go. When the vegetables soften, sprinkle the flour over the mixture and whisk vigorously for 2 minutes to create a smooth roux.
- Slowly pour in the chicken broth while whisking constantly to avoid lumps. Bring the mixture to a gentle simmer; you’ll see small bubbles forming along the edges. Reduce the heat to low and let the sauce thicken, which should take about 3–4 minutes. The sauce should coat the back of a spoon and be thick enough to hold its shape. If it’s too thick, add a splash of milk to reach the desired consistency.
- Stir in the shredded chicken, peas, and smoked paprika. Season with salt, pepper, thyme, and rosemary. Let the mixture simmer for 2 minutes to allow the flavors to meld. Taste and adjust seasoning; this is the moment you can fine‑tune the balance of savory and aromatic. The filling should look glossy and slightly thickened.
- While the filling simmers, preheat your oven to 375°F (190°C). Roll out the biscuit dough onto a lightly floured surface, cutting it into circles that fit snugly in each muffin tin cup. Place one dough circle in each cup, pressing gently to form a crust. If you’re using a silicone liner, lay it over the dough to keep the crust from sticking. This step ensures a crisp, golden top for each mini pie.
- Once the dough is in place, spoon the hot filling into each cup, filling them almost to the top. The filling should be hot and bubbly, creating steam that will puff the crust. Don’t overfill; a little room is needed for expansion. The aroma will fill the kitchen, and you’ll know you’re close to perfection.
- Place the muffin tin in the preheated oven and bake for 20–25 minutes, or until the crust is golden brown and the filling is bubbling. The crust should crackle slightly on the edges, signaling that it’s done. Check the pies at the 20‑minute mark; if they’re browning too fast, cover with foil. The baking time can vary slightly depending on your oven, so keep an eye on them.
- Remove the tin from the oven and let the pies rest for 5 minutes. This short rest allows the filling to set slightly, preventing it from spilling when you lift the cups. While they’re cooling, sprinkle fresh parsley over each pie for a burst of color and freshness. The rest period also lets the flavors meld further, enhancing the overall taste.
- Serve the mini pot pies warm, straight from the tin. The crust will still be crisp, and the filling will be hot and fragrant. If you’re serving at a gathering, arrange them on a platter for easy access. A quick drizzle of olive oil or a sprinkle of extra paprika can add a final touch of elegance.
- If you’re planning to make these ahead, assemble them in the fridge and bake when ready. The crust may be a bit softer, but the filling will still be delicious. For a quick reheating, simply warm them in a 350°F (175°C) oven for 10 minutes. This step will revive the crust’s crispness and bring the filling back to a steaming state.
- Enjoy the comforting, bite‑sized pot pies with a side of crisp salad or a splash of your favorite wine. The combination of flavors will leave you feeling satisfied and nostalgic. Remember, the key to success is patience during the sauté and a careful bake time. Once you master this technique, you’ll be able to tweak the recipe to suit any taste or occasion.
That’s it — you did it. But hold on, I’ve got a few more tricks that will take this to another level and make your mini pot pies even more unforgettable.
Insider Tricks for Flawless Results
The Temperature Rule Nobody Follows
Many cooks bake at 400°F, thinking it will speed up the crust’s golden finish. However, 375°F is the sweet spot that allows the crust to rise evenly without burning the filling. Keep the oven preheated for at least 10 minutes to maintain a consistent temperature. If your oven has hot spots, rotate the tin halfway through baking. This simple adjustment ensures a perfect crust every time.
Why Your Nose Knows Best
The scent of the simmering broth is a reliable indicator of readiness. When the aroma becomes rich and slightly caramelized, the filling is at its peak. Trust your nose; it will tell you when to reduce the heat and let the flavors meld. This instinctive cue helps prevent over‑cooking and keeps the dish moist.
The 5‑Minute Rest That Changes Everything
Letting the pies rest for exactly five minutes after baking allows the filling to set and the crust to firm up. This short pause also lets the steam redistribute, making the inside even more tender. If you cut into them immediately, you’ll get a messy mess of gravy. A quick rest is a small step that yields a big payoff in texture.
The Secret to a Flaky Crust
Adding a splash of cold water to the dough before rolling keeps the fat solid, resulting in a flaky crust. Alternatively, brush the crust with a beaten egg before baking for a glossy, golden finish. Don’t overwork the dough; a few gentle folds are enough to incorporate the ingredients. A flaky crust is the hallmark of a well‑executed pot pie.
The Quick Fix for a Sticky Filling
If the filling starts to look too thick, add a tablespoon of milk or broth at a time until you reach the desired consistency. A little liquid goes a long way in preventing the mixture from drying out. This tweak is especially useful if you’re using a thicker roux or a higher protein content. A balanced consistency keeps the filling silky and not pasty.
The One‑Minute Pre‑Bake for Extra Crispness
Place the assembled tin on a baking sheet and bake at 350°F for an additional minute after the initial bake. This second pass crisps the crust without over‑cooking the filling. Keep a close eye on the color; you want a golden hue, not a dark brown. This trick is especially handy when you’re serving a crowd and need a quick finish.
Creative Twists and Variations
Mediterranean Medley
Swap the regular chicken for shredded turkey and add sun‑dried tomatoes, olives, and feta cheese. The Mediterranean herbs like oregano and basil give the filling a bright, aromatic profile. This version is perfect for a light summer lunch or a flavorful appetizer. The combination of salty olives and tangy feta creates a delightful contrast with the buttery crust.
Sausage & Spinach Surprise
Replace the chicken with crumbled Italian sausage and fold in fresh spinach for a protein‑rich twist. The sausage adds a savory depth that pairs well with the mild spinach. This variation is a hit for meat lovers looking for a hearty, yet balanced dish. The spinach’s subtle earthiness complements the sausage’s robust flavor.
Veggie‑Loaded Delight
Omit the chicken entirely and double the veggies: add zucchini, bell pepper, and corn. Use a vegetable broth base to keep the dish light yet flavorful. This vegan version is still comforting and satisfying, with a colorful array of textures. The variety of vegetables creates a symphony of flavors that keeps each bite interesting.
Cheesy Mac & Cheese Fusion
Incorporate cooked macaroni and a blend of cheddar and Gruyère cheese into the filling. The cheese melts into a creamy sauce that coats the pasta strands. This fusion twist turns the pot pie into a decadent comfort food. The buttery crust and gooey cheese make it a guaranteed crowd‑pleaser.
Spicy Cajun Kick
Add a teaspoon of Cajun seasoning and a splash of hot sauce to the filling for a bold, spicy flavor. The heat from the Cajun blend pairs nicely with the smoky paprika. This version is ideal for those who enjoy a bit of heat in their comfort food. The spicy kick adds an exciting dimension to the classic pot pie.
Mushroom & Thyme Indulgence
Sauté sliced mushrooms with garlic and thyme before adding them to the filling. The earthy mushrooms provide a deep umami flavor that complements the chicken. This variation adds a luxurious texture and a sophisticated taste profile. The thyme’s aromatic notes enhance the overall depth of the dish.
Storing and Bringing It Back to Life
Fridge Storage
Store assembled, uncooked pies in an airtight container in the refrigerator for up to 24 hours. The crust may soften slightly, but the filling will stay fresh and flavorful. When you’re ready to bake, preheat the oven as directed and bake for the same time. This method is perfect for busy weeknights when you want a quick, homemade meal.
Freezer Friendly
Freeze the assembled pies in a freezer‑safe bag, removing as much air as possible. They can be stored for up to 2 months without loss of quality. When you’re ready to serve, thaw overnight in the refrigerator and bake at 375°F for 25 minutes. Freezing preserves the texture and flavor, making it a convenient option for meal prep.
Best Reheating Method
Reheat in a preheated 350°F oven for 10–12 minutes, or until the filling is steaming hot. If the crust looks dry, lightly brush it with melted butter before reheating to restore its buttery sheen. A quick 2‑minute microwave burst can also work, but it may make the crust soggy. The oven method retains the crispness and brings the dish back to its original glory.