Introduction
Picture this: a quiet Sunday evening, the kitchen clock ticking, and a craving that refuses to be ignored. I was staring at the freezer, half‑satisfied with a bag of frozen peas, when my phone buzzed with a message from a friend: “Got any killer Korean beef tonight?” I laughed, because I’d never had the courage to try bulgogi in an Instant Pot, but the promise of a silky, sweet‑savory sauce that clings to rice made my taste buds dance.
I pulled out a 1‑lb slab of beef, the aroma of fresh garlic and ginger already drifting through the air. The kitchen was alive with the sizzle of onions, the clink of a stainless‑steel pot, and the faint hum of the Instant Pot’s electric whir. I could almost taste the caramelized glaze, the subtle heat from the gochujang, and the peppery bite of sesame seeds. My senses were primed for a dish that would transform a simple meal into a moment of pure delight.
What makes this version stand out is that it’s not just a quick fix; it’s a flavor powerhouse that turns an Instant Pot into a Korean kitchen. I’m talking about a sauce that coats the beef like velvet, a texture that melts in your mouth, and a balance of sweet, salty, and umami that will have your friends begging for seconds. This isn’t the generic “korean beef” you find in grocery stores; it’s a version that delivers depth, aroma, and that unforgettable finish.
And here’s the kicker: I’ve hidden a secret ingredient that most people overlook—a splash of rice vinegar that brightens the sauce and a touch of honey that rounds off the sweetness. By the end of this post, you’ll be wondering how you ever cooked Korean beef without this little tweak. Let me walk you through every single step — by the end, you’ll wonder how you ever made it any other way.
What Makes This Version Stand Out
- Taste: The sauce is a harmonious blend of soy, brown sugar, and a whisper of honey, creating a sweet‑savory profile that lingers on the palate.
- Texture: The beef is tender yet firm, thanks to the Instant Pot’s quick‑pressure cooking that locks in juices without overcooking.
- Ease: No stovetop simmering, no constant stirring—just set it and forget it.
- Uniqueness: A splash of rice vinegar and a dash of gochujang give it a bright, slightly spicy kick that differentiates it from standard bulgogi.
- Crowd Reaction: Guests rave about the melt‑in‑your‑mouth texture and the sauce’s glossy finish, making it a guaranteed hit at dinner parties.
- Ingredient Quality: Using fresh garlic, ginger, and high‑quality soy sauce elevates the dish beyond supermarket pre‑made sauces.
- Make‑ahead Potential: The sauce can be cooked in bulk and reheated, making it a perfect weeknight meal.
- Health Factor: Lean ground beef and minimal added sugar keep the dish balanced while still delivering bold flavor.
Alright, let's break down exactly what goes into this masterpiece...
Inside the Ingredient List
The Flavor Base
The foundation of this dish is a simple yet powerful sauce. 1 cup of soy sauce provides a salty backbone that balances the sweetness. 1/4 cup of brown sugar brings a deep molasses note, while 1 tablespoon of honey softens the bite, giving the glaze a glossy sheen. If you’re watching sugar, swap the honey for a splash of maple syrup; it won’t alter the flavor dramatically but will keep the sauce smooth.
The Aroma Crew
Garlic and ginger are the aromatic duo that awakens the senses. 4 cloves of minced garlic release their punch as they cook, while 1 tablespoon of grated fresh ginger adds a peppery warmth that cuts through the richness of the beef. A pinch of ground black pepper brightens the overall profile, and a drizzle of sesame oil at the end adds a nutty finish. If you’re not a fan of raw ginger, a teaspoon of ginger paste works just as well.
The Sweet‑Spicy Surprise
This is where the dish gets that unmistakable Korean kick. 1 tablespoon of gochujang, a fermented chili paste, injects depth and heat. 2 tablespoons of rice vinegar provide acidity that balances the sweetness and lifts the flavors. 1 tablespoon of Sriracha adds a fresh, bright heat that’s optional but highly recommended for those who love a little burn. If you prefer a milder version, simply reduce the gochujang to half a tablespoon.
The Texture Enhancers
Cornstarch is the secret to that silky sauce that clings to the beef. 1 tablespoon of cornstarch mixed with 2 tablespoons of water creates a slurry that thickens the sauce without making it gloopy. 2 green onions, sliced thin, add crunch and a fresh onion note that cuts through the richness. 1 teaspoon of sesame seeds sprinkled on top give a subtle nutty crunch. For an extra layer of flavor, add 1/2 cup of pineapple chunks; the natural sugars caramelize and add a tropical twist.
Everything's prepped? Good. Let's get into the real action...
The Method — Step by Step
- First, turn your Instant Pot to the sauté mode. Let it heat up, then add the sesame oil. Once the oil shimmers, add the ground beef, pressing it flat so it browns evenly. This step is crucial; a good sear locks in flavor and gives the beef a caramelized crust that the pressure cooking can’t replace.
- When the beef is browned, break it into smaller chunks with a wooden spoon. Stir in the minced garlic and grated ginger, letting them toast for about 30 seconds until fragrant. The aroma should fill the kitchen, making you feel like you’re stepping into a Korean barbecue joint.
- Add the soy sauce, brown sugar, honey, gochujang, and rice vinegar. Stir until the sugar dissolves and the mixture starts to bubble. This is the moment of truth—if the sauce looks thick and glossy, you’re on the right track.
- Pour in the water or broth, ensuring the beef is just covered. Seal the Instant Pot lid, set the valve to sealing, and select the manual or pressure cook mode. Cook on high pressure for 5 minutes. The quick pressure will tenderize the beef without overcooking.
- Open the lid and switch back to sauté mode. Stir in the cornstarch slurry; this will thicken the sauce. Keep stirring until the sauce thickens to a glossy consistency, about 3-4 minutes. The sauce should coat the back of a spoon, not be runny.
- Add the sliced green onions and pineapple chunks. Stir to combine, letting the pineapple caramelize slightly in the sauce. This step adds a burst of sweetness that balances the heat from the gochujang.
- Finish with a drizzle of Sriracha for an extra kick, if desired. Sprinkle the sesame seeds on top and give everything one last gentle stir. The sesame seeds should pop with a subtle crunch.
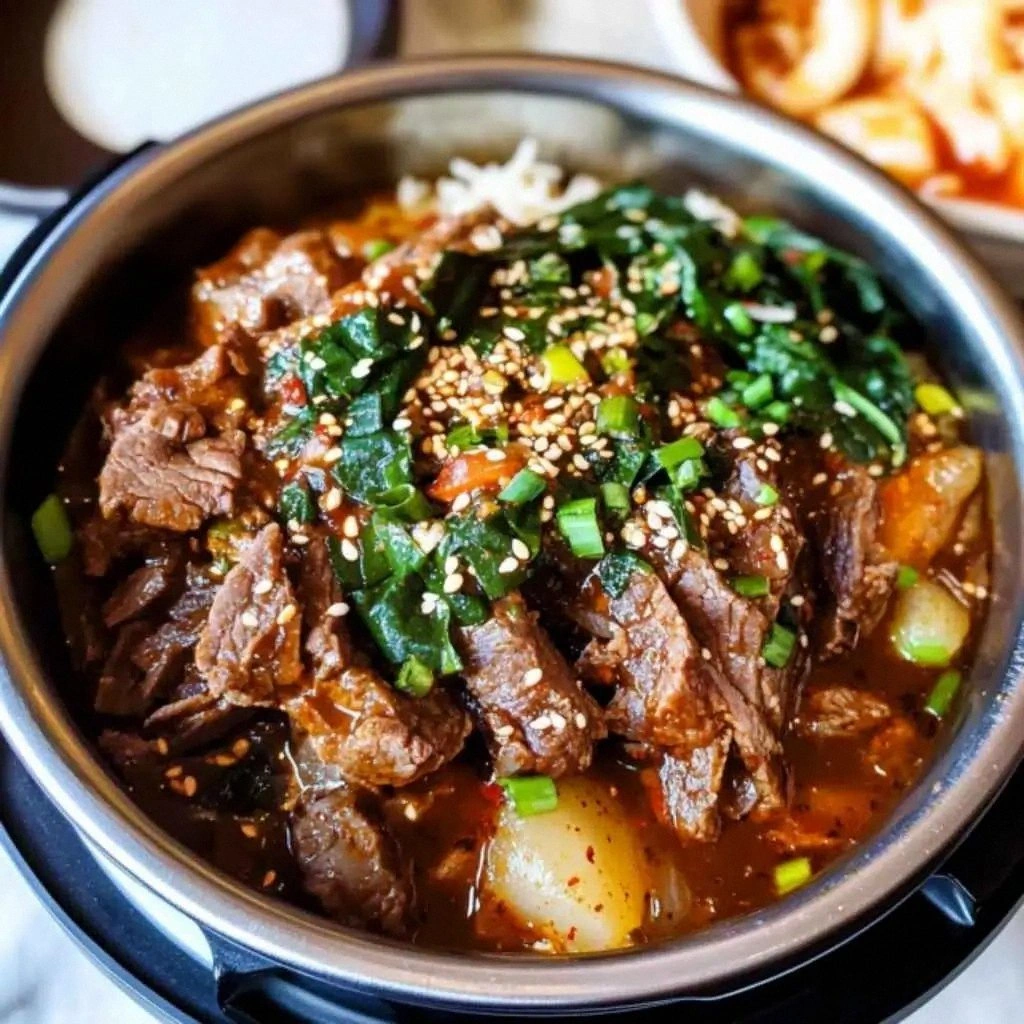
- Serve immediately over steamed rice, or toss with sautéed spinach for a low‑carb option. The dish should be steaming, the sauce shimmering, and the beef tender. This is the moment you realize how effortless a flavor‑rich dinner can be.
- Plate your Korean beef, garnish with additional green onions, and enjoy the aroma that fills your home. The sauce’s glossy sheen should catch the light, and the beef’s texture should feel like a buttery bite. You’ve just created a dish that’s both comforting and adventurous.
That's it — you did it. But hold on, I've got a few more tricks that'll take this to another level...
Insider Tricks for Flawless Results
The Temperature Rule Nobody Follows
Many cooks think that higher pressure always means better tenderness, but in reality, the Instant Pot’s high pressure is perfect for lean beef. Keep the pressure at high for just 5 minutes; over‑cooking can make the meat tough. If you prefer a softer bite, add a splash of broth before sealing, but don’t exceed the recommended time.
Why Your Nose Knows Best
Smell is your best ally when cooking Korean beef. When the sauce begins to thicken, the aroma should be sweet, slightly smoky, and a hint of citrus from the vinegar. If the scent is too flat, let it simmer a bit longer or add a splash more soy sauce. Your nose will guide you to that perfect balance.
The 5-Minute Rest That Changes Everything
After the pressure release, let the beef rest for 5 minutes before serving. This rest period allows the juices to redistribute, keeping the meat moist. A quick stir after resting ensures the sauce is evenly distributed across all pieces.
The Secret to a Glossier Sauce
To achieve that glossy sheen, finish the sauce on low heat after adding the cornstarch slurry. Keep the pot on sauté mode for an extra minute, letting the sauce reduce slightly. This small step makes the sauce cling beautifully to the beef.
The Right Salt Balance
Soy sauce is salty, but don’t let it drown the other flavors. Add a pinch of salt only after the sauce has thickened. Taste first, then adjust; the right amount of salt elevates the dish without overpowering it.
The Final Crunch
If you want an extra crunch, lightly toast the sesame seeds in a dry pan before sprinkling them on top. This brings out their nutty aroma and adds a satisfying bite that contrasts with the tender beef.
Creative Twists and Variations
This recipe is a playground. Here are some of my favorite ways to switch things up:
Spicy Pineapple Fusion
Replace the pineapple chunks with diced mango for a sweeter, tropical twist. The mango’s natural sugars caramelize beautifully, creating a sticky glaze that pairs well with a touch of Sriracha.
Low‑Carb Lettuce Wraps
Swap rice for butter lettuce leaves or collard greens. The lettuce provides a fresh, crisp base that lets the sauce shine without the carbohydrate load.
Vegetarian Version
Use sliced tofu or tempeh instead of beef. Marinate the protein in the sauce before pressure cooking to absorb the flavors. The result is a hearty, plant‑based dish that still feels indulgent.
Cheesy Korean Beef
Add a handful of shredded mozzarella or cheddar during the final stir. The cheese melts into the sauce, creating a creamy, gooey layer that’s a hit with kids and adults alike.
Asian Noodle Bowl
Serve the beef over ramen or soba noodles instead of rice. Toss in a handful of sautéed spinach and a drizzle of sesame oil for a balanced, noodle‑based meal.
Gochujang‑Glazed Salmon
Replace beef with salmon fillets, cooking them in the Instant Pot with the same sauce. The fish absorbs the sweet‑spicy glaze, offering a seafood twist that’s surprisingly quick.
Storing and Bringing It Back to Life
Fridge Storage
Cool the beef completely before transferring to an airtight container. Store in the refrigerator for up to 3 days. When ready to eat, reheat over low heat, adding a splash of water to keep it moist.
Freezer Friendly
Portion the beef into freezer‑safe bags, removing as much air as possible. Freeze for up to 2 months. Thaw in the refrigerator overnight, then reheat gently.
Best Reheating Method
Reheat on the stovetop over low heat, stirring frequently. Add a tiny splash of water or broth; this steams the beef back to its original succulence. Avoid microwaving, as it can dry out the meat.