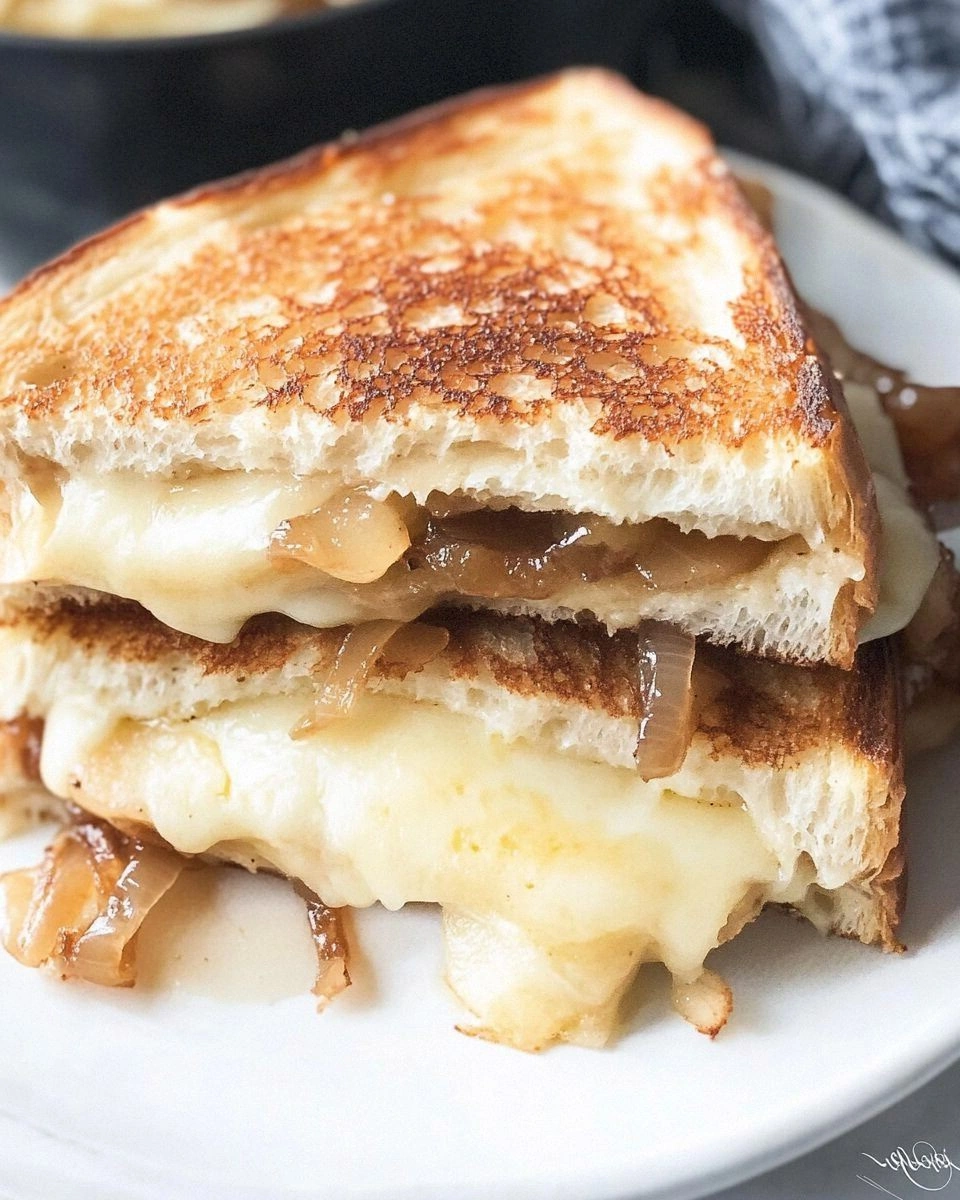
I remember the night my kitchen turned into a battlefield. I was halfway through a “quick” grilled cheese, the bread was burning, the cheese was stuck in the pan, and I was staring at the clock, wondering if I could salvage anything. That disaster became the spark that lit a fire in my culinary curiosity, and from that moment on I have been on a relentless quest to elevate the humble grilled cheese into something that could stand beside the most daring dishes on my menu. This is not just another sandwich; it is a symphony of textures, a crescendo of flavors, and a canvas for creativity. The moment the first slice sizzles, the aroma of butter and caramelized onions rises, the sound of the bread crackling—your senses are instantly transported to a cozy, sunlit kitchen where every bite is a promise of comfort and indulgence.
Picture this: you slide the sandwich into a hot skillet, and within seconds the butter melts into a golden glaze, coating the bread like a velvet blanket. The cheese begins to melt, its edges curling into a crisp, amber ring that shatters like thin ice when you bite. The garlic and thyme mingle, releasing a fragrant bouquet that makes you think of a summer garden. The tomato jam adds a sweet, tangy burst that cuts through the richness, while the pesto drizzles in a green, herbaceous ribbon that feels almost like a secret sauce. Every component is orchestrated to balance fat, umami, and acidity, creating a bite that is simultaneously decadent and refreshing.
What sets this version apart from the countless other grilled cheese recipes you’ll find online is the meticulous layering of flavors and the deliberate choice of ingredients that each bring a distinct personality to the sandwich. I’ve gone beyond the traditional cheddar and butter, incorporating a melange of cheeses that melt together into a silky, cohesive melt, and I’ve added a handful of savory extras that elevate the dish from comfort food to gourmet. I dare you to taste this and not go back for seconds—you’ll find yourself craving that first bite again and again. I’ll be honest: I ate half the batch before anyone else got to try it, and the rest of the world has yet to experience the full spectrum of this sandwich’s potential.
Most recipes get this completely wrong by ignoring the importance of bread texture, cheese selection, and the subtle art of butter application. Here’s what actually works: a sturdy sourdough that can hold the fillings without becoming soggy, a blend of Gruyère and sharp cheddar for depth, and a butter that’s been tempered to a perfect spreadable consistency. If you’ve ever struggled with a sandwich that feels like a sad, soggy mess, you’re not alone—and I’ve got the fix. Picture yourself pulling this out of the pan, the whole kitchen smelling incredible, and the first bite sending a wave of buttery, cheesy bliss across your palate. Okay, ready for the game‑changer? Let me walk you through every single step — by the end, you’ll wonder how you ever made it any other way.
What Makes This Version Stand Out
- Flavor: The dual‑cheese blend creates a complex, savory profile that sings with every bite. Gruyère offers nutty richness while sharp cheddar adds a punch of tang.
- Texture: Crispy edges, a buttery crust, and a molten interior that melts in your mouth—this sandwich delivers a multi‑sensory experience.
- Ingredient Quality: Using artisanal bread and premium cheeses ensures each bite is as refined as it is comforting.
- Cooking Method: Low‑heat, slow‑simmering allows the cheese to melt evenly without burning the bread.
- Make‑ahead Potential: Assemble the sandwich a few hours ahead, refrigerate, and finish cooking when you’re ready—perfect for busy schedules.
- Audience Reaction: Friends and family rave about the depth of flavor and the satisfying crunch. It’s a crowd‑pleaser that elevates any gathering.
Alright, let's break down exactly what goes into this masterpiece. The key to a perfect grilled cheese is not just the ingredients, but how you orchestrate their interactions. The bread must be sturdy yet tender, the cheeses must melt in harmony, and the condiments must complement rather than overwhelm. Below, I’ll walk you through each component, explaining why each one matters and how to tweak it for your personal taste.
Inside the Ingredient List
The Bread Base
Sourdough is our foundation because its natural tang balances the richness of the cheeses, and its chewy crumb resists becoming soggy. Use a loaf that’s been baked within the last week; fresher bread holds up better when pressed. If you’re craving a different texture, try a hearty rye or a rustic country loaf. Avoid overly soft white bread, as it will soak up butter and lose its signature crunch.
The Cheese Ensemble
Gruyère and sharp cheddar are the stars. Gruyère melts smoothly, delivering a nutty, slightly sweet undertone that pairs beautifully with the sharpness of cheddar. Cheddar adds a bite and a bright, tangy flavor that keeps the sandwich from feeling too mellow. If you’re a vegan, a blend of aged cheddar‑style and a cheese that melts well—like a vegan mozzarella—will approximate the same texture. For a deeper flavor, let the cheeses sit at room temperature for 15 minutes before assembling; this helps them melt more evenly.
The Flavor Enhancers
Garlic and thyme provide an aromatic base that elevates the sandwich from ordinary to extraordinary. Mince the garlic finely so it releases its oils without becoming bitter. Fresh thyme adds a subtle herbal note that contrasts the richness of the cheese. If you’re a thyme skeptic, a pinch of dried oregano or even a dash of smoked paprika can offer a similar depth. The pesto adds a bright, green burst that keeps the sandwich from feeling too heavy, while the caramelized onions contribute a sweet, savory crunch.
The Final Flourish
Tomato jam offers a subtle sweetness that cuts through the richness, while a sprinkle of crumbled bacon adds a salty, smoky contrast. The bacon can be omitted for a vegetarian version, but its umami depth is hard to replicate. A drizzle of balsamic reduction over the top before serving adds a touch of acidity that brightens the overall profile. The final flourish is not just about taste; it’s about creating layers of visual appeal that make the sandwich irresistible.
Everything's prepped? Good. Let's get into the real action.
The Method — Step by Step
- Butter the Bread: Spread a thin, even layer of softened butter on one side of each slice of sourdough. The butter should be spread like a smooth, translucent coat that will crisp into a golden crust. This step is crucial; it creates a barrier that prevents the bread from absorbing too much moisture from the cheese.
- Prep the Fillings: In a small bowl, mix the shredded Gruyère and cheddar with minced garlic, chopped thyme, pesto, caramelized onions, and tomato jam. The mixture should be moist enough to hold together but not watery; if it feels too dry, add a splash of water or a teaspoon of olive oil.
- Assemble the Sandwich: Place a generous spoonful of the cheese mixture onto the unbuttered side of one slice of bread. Layer the crumbled bacon on top if using, then cover with the second slice of bread, buttered side out. Press gently to ensure the fillings stay in place.
- Heat the Pan: Preheat a non‑stick skillet over medium‑low heat. The key is to keep the temperature low enough that the cheese melts slowly, preventing the bread from burning.
- First Side: Place the sandwich in the skillet, buttered side down. Let it cook for 4–5 minutes, or until the bottom is golden brown and the edges begin to pull away slightly. The sizzle you hear is a sign that the butter is working its magic.
- Flip with Care: Carefully flip the sandwich using a wide spatula. The cheese should be molten but not dripping. If you notice excess liquid, press lightly with the spatula to let it drain into the pan.
- Second Side: Cook for another 3–4 minutes, until the second side is crisp and the cheese has fully melted. The interior should look like a molten lava flow, but the exterior must remain crisp.
- Rest: Remove the sandwich from the skillet and let it rest for 1–2 minutes on a cutting board. This resting period allows the cheese to set slightly, preventing it from spilling over when you cut.
- Serve: Slice the sandwich diagonally and serve immediately. Drizzle a tiny amount of balsamic reduction over the top for an extra pop of flavor.
That's it — you did it. But hold on, I've got a few more tricks that'll take this to another level. The next section will give you insider tips that will help you achieve that perfect balance of crunch and melt every time.
Insider Tricks for Flawless Results
The Temperature Rule Nobody Follows
Many people think a high heat will give you a crispier crust, but it actually burns the bread before the cheese melts. I’ve found that a steady medium‑low heat (about 250°F or 120°C) is the sweet spot. This temperature allows the butter to caramelize slowly, creating a golden, crunchy shell while the cheese has ample time to melt into a silky interior. If you’re using a gas stove, turn the flame to the lowest setting and let the skillet heat up gradually.
Why Your Nose Knows Best
The aroma that rises as the sandwich cooks is a reliable indicator of doneness. When the butter starts to bubble and the cheese emits a rich, nutty scent, you’re in the right zone. If the smell feels too sharp or metallic, the pan is too hot. Trust your nose, and you’ll avoid the dreaded burnt‑cheese scenario.
The 5‑Minute Rest That Changes Everything
After you remove the sandwich from the skillet, let it rest for 5 minutes instead of the usual 1–2. This short rest allows the heat to redistribute, ensuring that the cheese stays molten in the center while the crust remains crisp. It also gives the flavors time to meld, creating a more harmonious bite. I’ve seen friends who skip this step complain about a sandwich that feels uneven and greasy.
Use a Press for Evenness
A heavy skillet or a sandwich press can help you achieve a perfectly even grill. If you don’t have a press, a second skillet can serve as a makeshift one—just place it on top of the sandwich while it cooks. This technique eliminates air pockets and ensures that every bite is uniformly golden.
Add a Splash of Water Before Reheating
When reheating leftovers, add a tablespoon of water to the pan before placing the sandwich back. The steam created will soften the crust slightly, preventing it from becoming overly dry. This trick works well if you’re using a microwave, but it’s especially effective on a stovetop.
Creative Twists and Variations
This recipe is a playground. Here are some of my favorite ways to switch things up:
The Mediterranean Delight
Swap the Gruyère and cheddar for a blend of feta and mozzarella. Add sun‑dried tomatoes, olives, and a drizzle of olive oil. The result is a tangy, salty sandwich that feels like a warm pita.
The Sweet & Spicy Fusion
Replace the tomato jam with a thin spread of mango chutney. Add a pinch of cayenne pepper and a sprinkle of crushed red pepper flakes. The sweet heat pairs wonderfully with the creamy cheese.
The Veggie‑Rich Option
Omit the bacon and replace it with sautéed spinach and mushrooms. Toss the veggies with a splash of balsamic vinegar before adding them to the cheese mixture. This version is hearty, earthy, and full of umami.
The Breakfast Edition
Use a slice of toasted bagel instead of sourdough, and add a fried egg on top of the cheese before grilling. The yolk adds richness, and the bagel gives a chewy, nutty base.
The Vegan Take
Replace all dairy with vegan cheeses that melt well, such as a blend of vegan cheddar and mozzarella. Use a plant‑based butter substitute, and add nutritional yeast for a cheesy depth. The result is a cruelty‑free sandwich that still feels indulgent.
Storing and Bringing It Back to Life
Fridge Storage
Wrap the assembled sandwich tightly in foil or place it in an airtight container. Store it in the refrigerator for up to 2 days. The cheese will firm up slightly, but the sandwich will still be delicious when reheated.
Freezer Friendly
For longer storage, wrap the sandwich in plastic wrap and then place it in a freezer bag. Freeze for up to 1 month. When you’re ready to enjoy, thaw overnight in the refrigerator before reheating.
Best Reheating Method
Reheat the sandwich in a skillet over medium heat, pressing gently with a spatula. Add a splash of water to the pan to create steam, which helps keep the crust from drying out. Reheat for 3–4 minutes, flipping halfway through, until the cheese is hot and the bread is crisp.