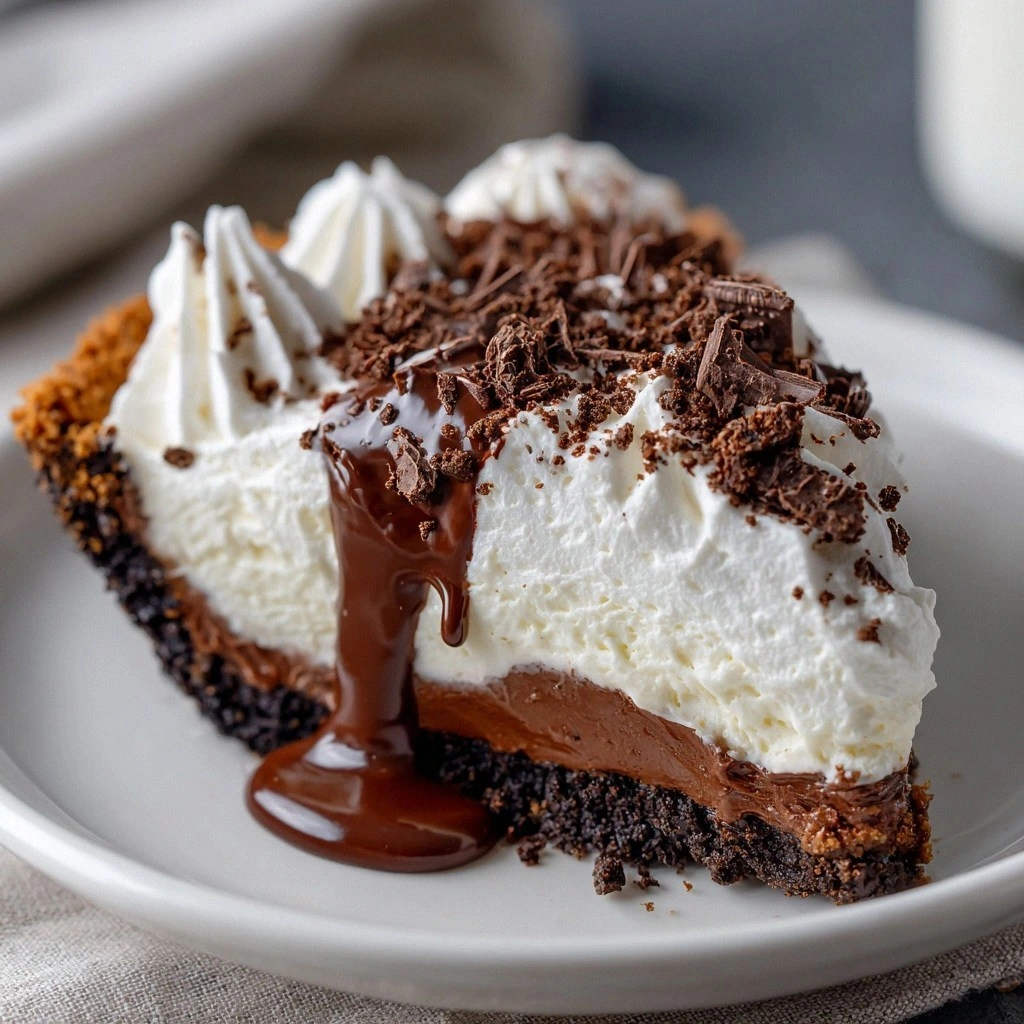
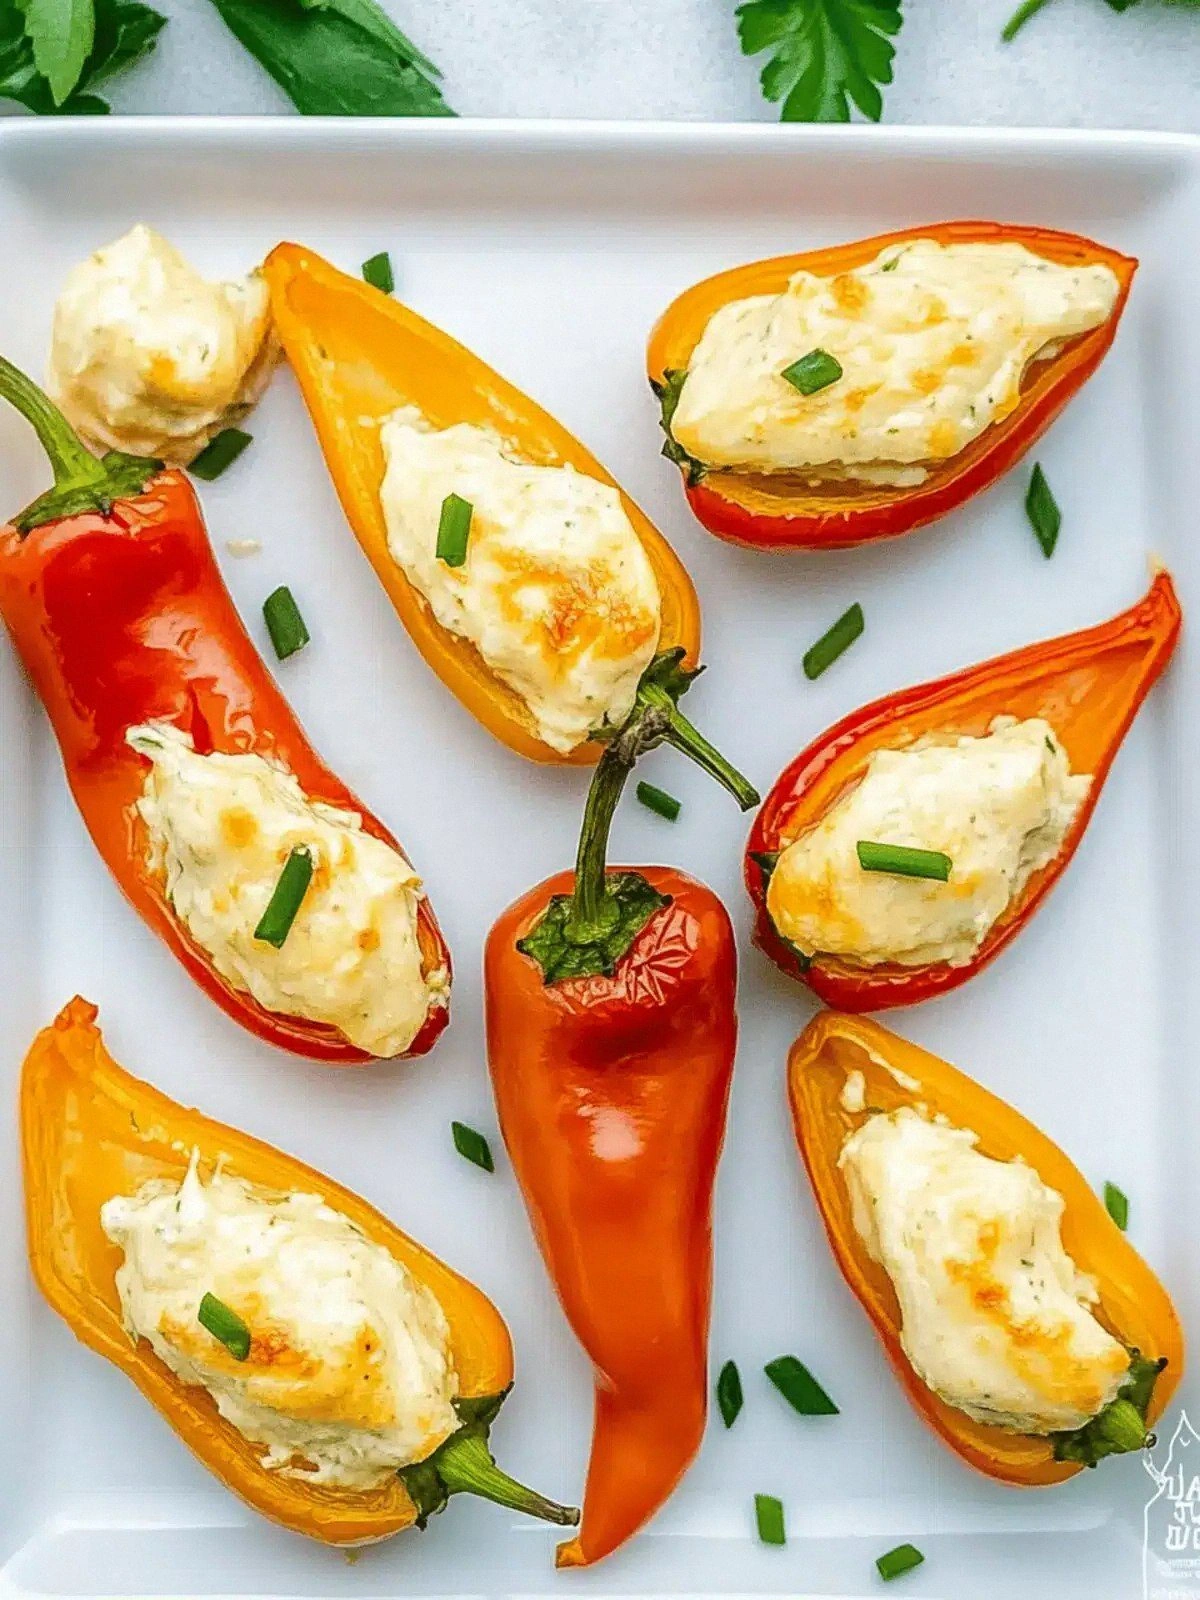
I was in the middle of a late‑night pizza binge when I realized my kitchen was a mess of melted cheese, half‑cooked dough, and a fridge that smelled like a forgotten casserole. The chaos was a recipe for disaster—until a bright idea popped into my head like a flash of neon: mini bell peppers stuffed with creamy, cheesy goodness. I grabbed the smallest peppers I could find, sliced them like tiny sunflowers, and imagined a burst of color on my plate. The aroma that hit my nose as I mixed cream cheese, cheddar, and herbs felt like a warm hug from a childhood kitchen. If you’ve ever felt the sting of a kitchen mishap, you’ll understand why this simple tweak feels like a culinary salvation.
Picture yourself pulling these little gems from the oven, the whole kitchen smelling incredible, and the first bite releasing a silky, tangy wave that coats your tongue like velvet. I dare you to taste this and not go back for seconds—once the first bite hits, you’ll be hooked. This is hands down the best version you’ll ever make at home, and I’m about to show you why it’s a game‑changer. The secret isn’t in the ingredients alone; it’s in the way they dance together, the technique that locks in moisture, and a few hacks that elevate the flavor. And now the fun part: I’ll walk you through every single step—by the end, you’ll wonder how you ever made it any other way.
Most recipes get this completely wrong. They overcook the peppers, underseason the filling, or forget the crunchy edge that gives the dish that satisfying snap. The result? A soggy, bland appetizer that feels like a missed opportunity. I’ve spent months tweaking this recipe, balancing textures, and mastering the timing so that each pepper is crisp on the outside and luxuriously creamy inside. The key is to keep the peppers whole, not to slice them in half, and to let the cheese melt into a smooth, golden filling. That simple decision turns a humble side into a crowd‑pleasing star.
If you’ve ever struggled with stuffed peppers, you’re not alone—and I’ve got the fix. The trick is to pre‑cook the peppers just enough to soften them, then finish them in the oven with the cheese mixture. This method locks in the pepper’s natural sweetness while preventing the filling from becoming watery. The result is a bite that bursts with flavor and a texture that feels like a dream. I’ll also show you a sneaky seasoning blend that brings everything together without overpowering the fresh pepper. Trust me, once you try this, you’ll never go back to the ordinary version again.
What Makes This Version Stand Out
- Flavor: The combination of creamy cream cheese and sharp cheddar creates a layered taste that lingers on the palate. The all‑purpose seasoning adds a subtle depth that mimics the savory notes of a classic Italian risotto. A pinch of chives gives a bright, herbal finish that cuts through the richness.
- Texture: The peppers stay firm and slightly crunchy, contrasting with the silky filling that melts in your mouth. The cheese mixture coats the pepper like a velvet blanket, ensuring each bite is cohesive. The result is a harmonious blend of crunch and melt.
- Simplicity: With only five main ingredients, this recipe is quick to assemble and even quicker to cook. No elaborate sauces or secret spice blends—just pure, honest flavor. It’s the perfect choice for a busy weeknight or a last‑minute party appetizer.
- Uniqueness: The use of garden vegetable cream cheese gives the filling a subtle vegetal undertone that sets it apart from traditional cream cheese recipes. The pepper’s natural sweetness balances the richness, creating a memorable taste profile. This twist makes the dish stand out at any gathering.
- Crowd Reaction: Friends rave about the colorful presentation and the burst of flavor. They keep asking for the recipe after each gathering, and I’m always delighted to share the secret. The dish’s visual appeal and taste make it a guaranteed hit.
- Ingredient Quality: Choosing fresh mini bell peppers and high‑quality cream cheese makes a noticeable difference. The sharper cheddar adds a punch that elevates the filling’s depth. Fresh herbs finish the dish with a bright aroma.
- Cooking Method: Baking the peppers with the filling allows the flavors to meld while keeping the peppers tender. The oven’s even heat ensures a uniform golden crust. This method is foolproof and produces consistent results.
- Make‑Ahead Potential: The stuffed peppers can be assembled in advance and chilled, then baked right before serving. This prep time saves you on the day of the event. The flavors develop over time, making the dish even more delicious.
Alright, let’s break down exactly what goes into this masterpiece…
Inside the Ingredient List
The Flavor Base
Mini bell peppers are the star of the show, offering a sweet, peppery note that complements the creamy filling. Their vibrant colors—red, yellow, and green—add a festive touch to any table. If you can’t find mini peppers, regular bell peppers can be used; just slice them into smaller, bite‑size pieces. The pepper’s natural sugars caramelize slightly during baking, creating a subtle sweetness that balances the richness of the cheese.
The Texture Crew
Garden vegetable cream cheese provides a smooth, silky base that melts effortlessly. Its subtle vegetable undertones add complexity and depth, preventing the filling from feeling flat. The shredded cheddar brings a sharp, tangy bite that cuts through the creaminess. Together, they form a filling that coats the pepper like velvet, delivering a luxurious mouthfeel.
The Unexpected Star
All‑purpose seasoning is the secret sauce that ties everything together. It adds savory depth without overwhelming the delicate flavors of the peppers. If you prefer a milder taste, reduce the amount slightly or use a custom blend of herbs. The seasoning also gives the dish a subtle, comforting aroma reminiscent of a homemade casserole.
The Final Flourish
Fresh chives or flat leaf parsley provide a bright, herbaceous finish that lifts the dish. Their green hue adds a pop of color that makes the peppers look even more appetizing. If you’re looking for a different twist, try a sprinkle of crushed red pepper flakes for a hint of heat. The herbs finish the dish with a fragrant, fresh note that balances the richness.
Everything’s prepped? Good. Let’s get into the real action…
The Method — Step by Step
- Preheat your oven to 375°F (190°C) and line a baking sheet with parchment paper. This ensures the peppers won’t stick and makes cleanup a breeze. Keep the heat steady to avoid overcooking the filling. The oven’s gentle heat allows the peppers to soften while the cheese melts into a golden crust.
- Wash the mini bell peppers, slice them in half lengthwise, and remove the seeds. Gently press the halves together to keep them from falling apart during baking. The pepper’s natural sweetness will caramelize slightly, adding a subtle depth to the flavor profile.
- In a bowl, combine the garden vegetable cream cheese and shredded cheddar. Mix until the mixture is smooth and well blended. The creamy base will coat the pepper like velvet, delivering a luxurious texture with every bite.
- Add the all‑purpose seasoning and chopped chives or parsley to the cheese mixture. Stir until the herbs are evenly distributed. This step ensures that every bite is bursting with flavor and a hint of freshness.
- Fill each pepper half with the cheese mixture, packing it snugly but not overflowing. The filling should sit just below the rim to prevent spillage during baking. The more evenly you distribute the filling, the more uniform the bake.
- Place the stuffed peppers on the prepared baking sheet, seam side up. Arrange them in a single layer to allow even cooking. This positioning ensures that the peppers bake uniformly without steaming.
- Bake for 20–25 minutes, until the peppers are tender and the filling is golden brown and bubbly. The edges will start pulling away, indicating that the cheese has set perfectly. Keep an eye on them to avoid over‑browning.
- While the peppers bake, preheat a skillet over medium heat for a quick sauté. Add a splash of olive oil and a pinch of salt to taste. This step will give you a side dish that pairs beautifully with the stuffed peppers.
- Sauté diced onions, garlic, and a handful of chopped spinach until the spinach wilts and the onions soften. The aromatic mixture will complement the cheesy peppers, adding a fresh, savory note. Once done, set aside to finish the plate.
- Remove the peppers from the oven, let them cool for a few minutes, and serve hot with the sautéed greens. The combination of creamy peppers and fresh greens creates a balanced, satisfying bite. Enjoy the burst of flavors that dance across your palate.
Insider Tricks for Flawless Results
The Temperature Rule Nobody Follows
Many cooks bake stuffed peppers at a high temperature, causing the filling to burn before the pepper softens. I discovered that a moderate 375°F (190°C) allows the cheese to melt evenly while the pepper cooks through. The result is a creamy center that stays intact and a golden crust that adds texture. Consistency is key, so keep the oven temperature steady throughout.
Why Your Nose Knows Best
Before you pull the peppers out of the oven, listen for that unmistakable aroma of melted cheese and caramelized pepper. That scent signals that the filling has set perfectly. If the smell is too mild, give them a few more minutes. Trust your senses—your nose is the best judge of readiness.
The 5-Minute Rest That Changes Everything
Let the peppers rest for 5 minutes after baking; this allows the filling to set further and prevents hot cheese from spilling when you cut into them. The brief pause also lets the pepper’s juices redistribute, creating a more cohesive bite. Skip this step and risk a messy, uneven texture.
The Secret of Fresh Herbs
Chopped chives or flat leaf parsley add a bright, herbal note that lifts the dish. If you’re using dried herbs, use a fraction of the amount to avoid overpowering the flavor. Fresh herbs also bring a burst of color, making the dish visually appealing.
The Magic of Cheese Ratio
Balancing the ratio of cream cheese to cheddar is essential. Too much cream cheese can make the filling too runny; too much cheddar can overpower the pepper’s sweetness. A 3:1 ratio works best for a creamy yet flavorful result. Adjust as needed based on your taste preference.
The Final Touch: A Splash of Water
Adding a splash of water to the baking dish before placing the peppers creates a subtle steam that keeps the filling moist. This technique is especially useful if you’re baking in a cooler kitchen or using a lower oven temperature. The steam prevents the filling from drying out, ensuring a luscious bite.
Creative Twists and Variations
Spicy Jalapeño Kick
Add finely chopped jalapeños to the cheese mixture for a subtle heat that pairs well with the sweet peppers. The spiciness cuts through the richness, creating a balanced flavor profile. This variation is perfect for guests who enjoy a bit of fire in their food. Serve with a dollop of sour cream to mellow the heat.
Mediterranean Medley
Replace the cheddar with crumbled feta and add sun‑dried tomatoes for a Mediterranean twist. The salty feta contrasts beautifully with the sweet peppers, while the tomatoes add a burst of umami. This version feels like a Mediterranean garden in every bite. Pair it with a light vinaigrette for a complete meal.
Cheese Lover’s Dream
Use a blend of smoked gouda and mozzarella for a richer, smokier flavor. The gouda adds depth while the mozzarella provides a stretchy, gooey texture. This variation turns the dish into a decadent snack that satisfies every cheese craving. It’s a crowd‑pleaser at any gathering.
Vegan Vibes
Swap the cream cheese for a plant‑based alternative and use nutritional yeast instead of cheddar. This creates a creamy, cheesy flavor without dairy. The peppers remain tender and the filling stays moist. Vegan guests will love this guilt‑free version.
Herb Garden Surprise
Add a mix of fresh basil, oregano, and thyme to the filling for a fragrant herb burst. The herbs infuse the cheese with aromatic layers that complement the pepper’s natural sweetness. This variation feels like a fresh garden on a summer afternoon. Serve with a drizzle of balsamic glaze for extra depth.
Sweet and Salty Fusion
Incorporate a drizzle of honey into the cheese mixture for a sweet, caramelized finish. The honey pairs beautifully with the pepper’s sweetness and the cheese’s richness. This twist creates a unique flavor profile that’s both sweet and savory. It’s an unexpected delight that will surprise your guests.
Storing and Bringing It Back to Life
Fridge Storage
Store the assembled peppers in an airtight container in the refrigerator for up to 48 hours. Keep them flat to maintain their shape and prevent the filling from spilling. When ready to serve, reheat in a 350°F oven for 10 minutes, or microwave on low for 1–2 minutes. The peppers will stay moist and the cheese will remain creamy.
Freezer Friendly
Freeze the stuffed peppers in a freezer‑safe bag for up to 3 months. Thaw overnight in the refrigerator before reheating. Reheat at 350°F for 15 minutes, or microwave on medium for 3–4 minutes. The texture remains tender, and the cheese stays silky.
Best Reheating Method
Reheating in the oven preserves the pepper’s crisp edges and the cheese’s golden crust. If you’re in a hurry, use the microwave but add a splash of water to create steam. This trick keeps the filling moist and prevents it from drying out. The result is a dish that tastes freshly baked.