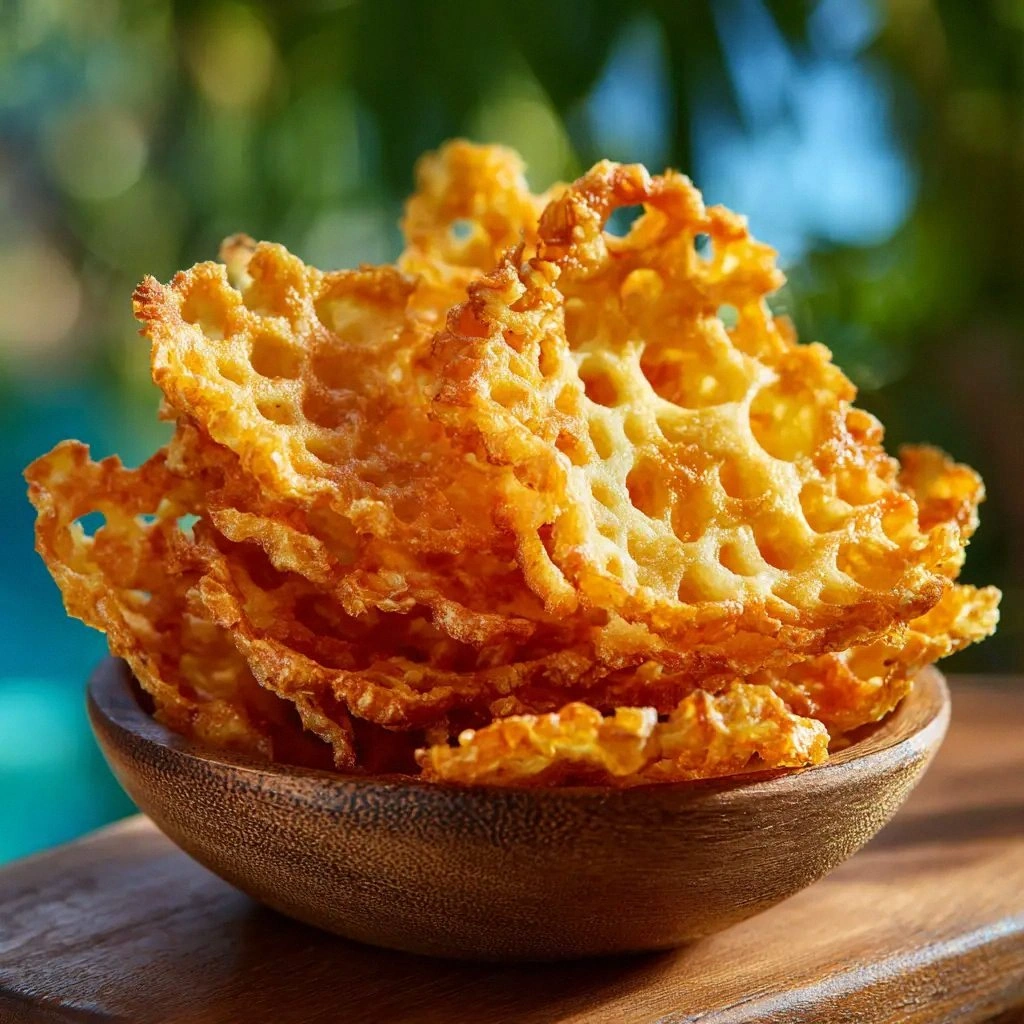
Cottage Cheese Chips (The Vira
I was staring at a tub of full‑fat cottage cheese that had been sitting in my fridge for a week, feeling a pang of guilt for not using it. The next morning I remembered a dare from a friend: “Make the crispiest snack you’ve ever had, or I’ll roast you for a week.” I grabbed my oven, a sheet of parchment, and a whisk, and set out to transform that bland, lumpy dairy into a crunchy, savory sensation. The kitchen smelled of dairy and anticipation, the air thick with the promise of something extraordinary. The sound of the timer ticking felt like a metronome to the rhythm of my excitement. The taste of that first bite—salty, slightly tangy, and utterly satisfying—sent a wave of relief through my body. I was ready to share the secret with anyone who’d ever thought cottage cheese was only for breakfast or a side dish.
Picture the moment your oven preheats to 400°F, the heat radiating like a warm hug. Imagine the cottage cheese, thick and creamy, being whisked into a silky batter that glistens under the kitchen lights. The aroma that begins to unfurl is a gentle reminder that you’re about to create something truly special. This isn’t just a snack; it’s a testament to how ordinary ingredients can be elevated through the right technique. I’m talking about a texture that shatters like thin ice when you bite into it, revealing a burst of umami. This version is hands down the best you’ll ever make at home, and it’s about to become your new favorite go‑to snack. If you’re skeptical, I dare you to taste this and not go back for seconds.
I’ll be honest—my first batch was a disaster. The chips were soft, the edges soggy, and the flavor flat. I blamed the cottage cheese for being too wet, but I was wrong. The real culprit was the baking technique, and that’s what I learned today. The secret lies in the precise balance of moisture, temperature, and timing, which I’ll walk you through step by step. By the end of this post, you’ll wonder how you ever made it any other way. Picture yourself pulling these out of the oven, the whole kitchen smelling incredible, and seeing those golden, crisp edges that invite a second bite.
If you’ve ever struggled with making anything crispy in the oven, you’re not alone—this recipe fixes that problem with a simple, foolproof method. The first thing I did was to preheat the oven to 400°F, which is the sweet spot for getting that crunch without burning. I used parchment paper to keep the chips from sticking, and I spread the mixture thinly so it could crisp evenly. The result? A snack that’s light, airy, and packed with protein. The best part? It takes less than an hour from start to finish, so you can enjoy it any time of day. I’ll be sharing the exact ratios, temperatures, and timing that make these chips stand out from every other recipe out there. Let me walk you through every single step—by the end, you’ll wonder how you ever made it any other way.
I’ve spent years experimenting with snack recipes, and every time I’ve stumbled on something that feels like a breakthrough. This recipe is one of those breakthroughs. It’s simple, it’s tasty, and it’s a game‑changer for anyone who loves a good crunch. I’ll be honest: the first batch was a mess, but the second was a triumph. That’s the kind of learning curve that turns a kitchen disaster into a culinary triumph. And now, with the right technique, you can replicate this success every single time.
What Makes This Version Stand Out
The brilliance of these chips comes from a combination of factors that most recipes overlook. Below are the key elements that make this version unique, and why you’ll love them.
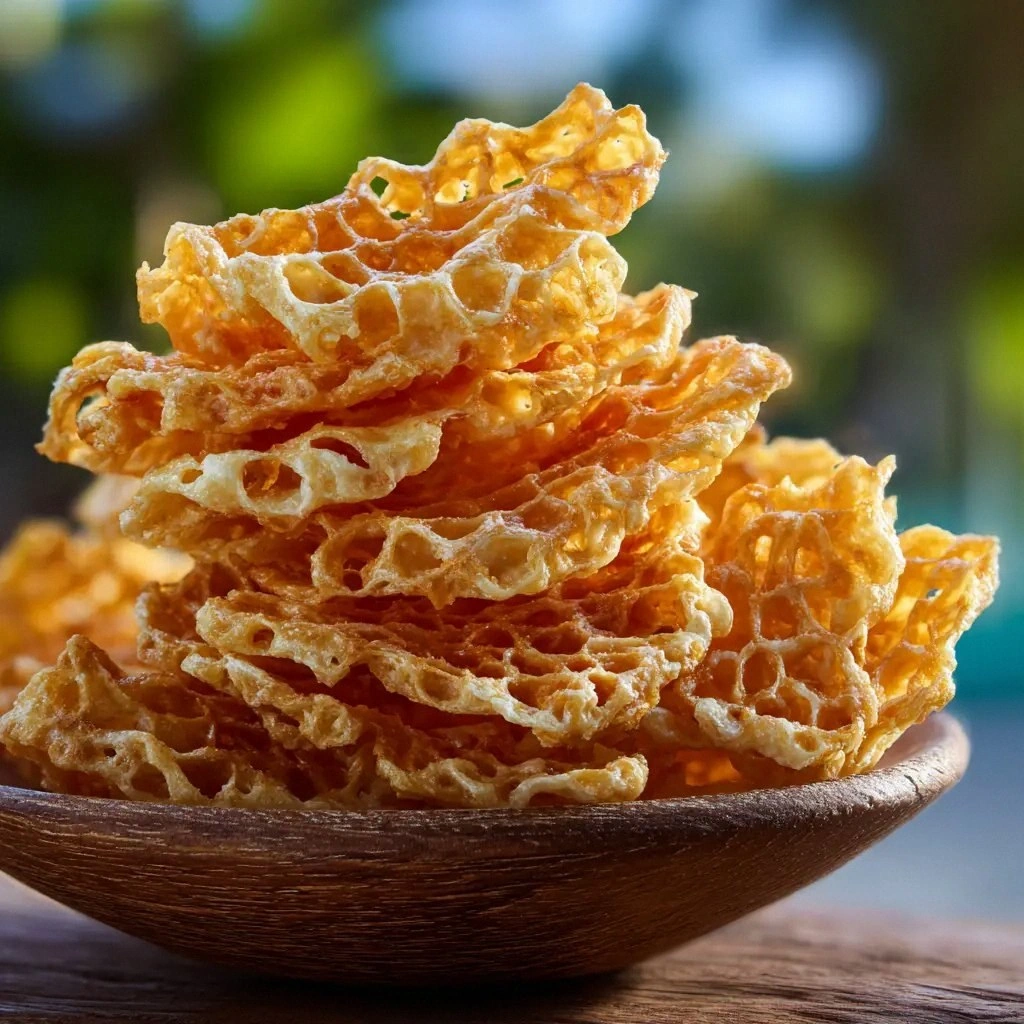
- Texture: The batter’s thin spread creates a delicate, airy structure that snaps with each bite, unlike the dense, heavy chips from other recipes.
- Flavor: The blend of garlic powder, onion powder, and a touch of salt elevates the natural tang of the cottage cheese into a savory punch that lingers.
- Simplicity: With only four ingredients, you can whip up a gourmet snack in minutes without rummaging through your pantry.
- Protein Power: Each serving delivers 25 grams of protein, making this a perfect post‑workout or midday pick‑me‑up.
- Versatility: The base can be customized with herbs, spices, or even a drizzle of hot sauce for different flavor profiles.
- Make‑Ahead: These chips keep well in the fridge for up to three days, and they’re even better the next day when the crispness reasserts itself.
- Low Carb: With only 30 grams of carbs per four servings, they’re a low‑carb alternative to traditional potato chips.
- Kid‑Friendly: Their mild flavor and crunchy texture make them a hit with kids, turning snack time into a fun, healthy activity.
Alright, let’s break down exactly what goes into this masterpiece. The first step is to prepare the cottage cheese, and that’s where the magic begins.
The first thing to do is to let the cottage cheese sit at room temperature for about ten minutes. This helps it soften and blend more easily with the spices. I’ve found that letting it sit for even a few minutes before whisking reduces the risk of clumps and creates a smoother batter. Once it’s at the right consistency, the next step is to add the seasonings, which bring depth and aroma to the final product. The combination of garlic and onion powder creates a savory backbone that balances the mild tang of the cheese. If you’re a fan of a little heat, a pinch of cayenne pepper will add a subtle kick.
The key to getting the perfect crunch is in the spread. Use a spatula to lay the batter as thin as possible on parchment paper. A thin layer ensures even cooking and prevents the chips from becoming doughy. I like to use a silicone baking mat for extra non‑stick performance, but parchment works just fine. Don’t forget to preheat your oven to 400°F before you start spreading the batter; this ensures the chips start crisping right away.
The Flavor Base
The flavor base is where the magic begins. The cottage cheese itself provides a mild, creamy backdrop that’s both rich and subtly sweet. When combined with garlic and onion powder, it transforms into a savory masterpiece. The salt is essential to bring out the natural flavors and create that satisfying bite. If you’re watching sodium, you can reduce the amount slightly, but the flavor will be noticeably lighter. This base is the foundation upon which all the other elements build, so treat it with the respect it deserves.
Choosing the right cottage cheese is crucial. Full‑fat cottage cheese offers the best flavor and texture, but if you’re on a low‑fat diet, you can use a reduced‑fat version. Just be aware that it may produce a slightly different mouthfeel. The key is to keep the mixture moist enough to spread but not so wet that it drips. If the batter is too thick, add a splash of milk or water to thin it out. The goal is a smooth, pourable consistency that spreads easily.
The Texture Crew
The texture crew includes the cottage cheese itself, the whisking process, and the baking time. Together they create a chip that’s light and airy yet sturdy enough to hold its shape. The whisking step is where you break down the curds and create a homogeneous mixture. A good whisk or blender will help eliminate lumps and ensure even seasoning distribution. The result is a batter that spreads evenly and cooks into a crisp, golden chip.
Once the batter is spread, the oven does the heavy lifting. Baking at 400°F for 30 minutes allows the moisture to evaporate, leaving behind a crisp exterior. If you’re worried about burning, keep an eye on the edges; they should be golden brown but not dark. A quick flip halfway through helps ensure even cooking on both sides. The final product should have a delicate crunch that gives way to a soft, buttery interior.
The Unexpected Star
The unexpected star of this recipe is the subtle tang that comes from the cottage cheese itself. Most people overlook the natural acidity of cottage cheese, but it’s what gives these chips their unique flavor profile. The tang pairs beautifully with the savory seasonings and creates a complex, satisfying taste. When you bite into a chip, the initial crunch is followed by a burst of creamy, tangy flavor that lingers on the palate. This combination of textures and flavors is what sets these chips apart from any other snack you’ve tried.
If you want to play with the flavor further, consider adding a pinch of smoked paprika for a smoky undertone or a splash of lemon juice for a bright, citrusy note. Each addition changes the flavor landscape, but the base remains the same. The cottage cheese’s tang will always be the star, shining through each variation. That’s what makes this recipe so versatile and endlessly customizable.
The Final Flourish
The final flourish is the finishing touch that elevates these chips from good to great. A light spray of olive oil or a dusting of extra garlic powder right before baking adds an extra layer of flavor and helps the chips develop a golden crust. I like to finish the batter with a quick drizzle of melted butter for a richer taste. If you prefer a dairy-free version, a splash of nutritional yeast can replace the butter for a cheesy, umami flavor. The key is to add the flourish just before baking, so it doesn’t burn or create excess moisture.
The final flourish also includes the cooling process. Allow the chips to cool on a rack for at least 10 minutes before breaking them into pieces. This step ensures the chips set properly and retain their crispness. If you try to break them while they’re still hot, they’ll become brittle and break into crumbs. The cooling stage is often overlooked, but it’s essential for achieving the perfect crunch.
Everything's prepped? Good. Let's get into the real action. The method is straightforward, but the timing and temperature are critical for the perfect crunch. I’ll walk you through each step, so you can replicate this success every time. If you’re ready, let’s dive in.
The Method — Step by Step
- Preheat your oven to 400°F (200°C). Line a baking sheet with parchment paper or a silicone mat to prevent sticking. The high temperature ensures the moisture evaporates quickly, creating that signature crunch. Don’t rush this step; a properly preheated oven is the foundation of crispy results. If you’re using a convection oven, reduce the temperature by 25°F for even cooking. Let the oven settle for at least 10 minutes before placing the batter inside.
- While the oven is preheating, let the cottage cheese sit at room temperature for about ten minutes. This softens the curds, making them easier to whisk into a smooth batter. The cheese should feel slightly gooey, not runny. If it’s still too thick, add a splash of milk or water to thin it out. This step is crucial for achieving a consistent spread. Remember, a smooth batter spreads evenly and cooks evenly.
- In a mixing bowl, combine the softened cottage cheese with 1 tsp garlic powder, 1 tsp onion powder, and ½ tsp salt. Whisk until the mixture is homogeneous and free of lumps. The spices should be evenly distributed, creating a uniform flavor profile. If you’re a fan of extra heat, add a pinch of cayenne pepper. The mixture should feel like a thick, creamy paste. This is the flavor base that will carry through the chip.
- Using a spatula, spread the batter onto the prepared baking sheet. Aim for a thickness of about 1/8 inch (3 mm). The thinner you spread, the crispier the final product. Try to keep the edges even so the chips bake uniformly. If you’re using a silicone mat, the batter will slide slightly, so be gentle. The batter should look glossy and smooth. This step sets the stage for the crunch.
- Place the baking sheet in the preheated oven. Bake for 30 minutes, flipping the batter halfway through to ensure even browning. Keep an eye on the edges; they should turn golden brown but not black. The interior should be firm but still slightly pliable. The aroma that begins to develop is a sign that the chips are nearing perfection. Once the time is up, remove the sheet from the oven and let it cool for 10 minutes on a rack.
- After cooling, carefully lift the sheet off the parchment. Use a spatula to lift the entire sheet, then break the batter into chip-sized pieces. The chips should snap cleanly, indicating they’re crisp. If they’re still soft, give them a few extra minutes in the oven. The goal is a delicate, airy crunch that dissolves in your mouth. This is the moment of truth; your patience will pay off.
- Transfer the chips to a bowl or a shallow dish. If you like a bit of extra flavor, sprinkle a dash of smoked paprika or a pinch of chili flakes on top. Let the chips rest for a minute to absorb the seasoning. This final touch will elevate the snack from good to unforgettable. The chips should feel dry and crisp, ready to be devoured. Serve immediately or store in an airtight container.
- If you’re storing the chips, place them in a zip‑lock bag or a sealed container. Keep them in the fridge for up to three days. The cool environment preserves the crispness and prevents mold growth. When you’re ready to eat, give them a quick reheat in the oven at 350°F for 5 minutes to restore that fresh, warm crunch. The chips should feel crisp again, like they just came out of the oven.
- If you prefer a dairy‑free version, substitute the cottage cheese with a tofu-based mixture. Blend silken tofu with garlic powder, onion powder, and a pinch of salt. The texture will differ slightly, but the flavor profile remains similar. Adjust the baking time as needed, as tofu may bake faster. This variation is great for those with dietary restrictions.
- For an extra indulgent version, drizzle melted butter over the chips right before serving. The butter adds a silky richness that pairs beautifully with the savory spices. Alternatively, a sprinkle of nutritional yeast can give a cheesy, umami depth without the dairy. These additions transform the snack into a party‑ready treat that will wow your guests.
That’s it — you did it. But hold on, I've got a few more tricks that'll take this to another level. The next section will reveal insider secrets that will elevate your chip game from average to unforgettable. These tips are the difference between a good snack and a snack that becomes the talk of the kitchen.
Insider Tricks for Flawless Results
The Temperature Rule Nobody Follows
Many people assume that higher heat is always better for crispness, but that’s a myth. The key is to bake at a moderate temperature that allows moisture to escape without scorching the surface. I’ve found 400°F to be the sweet spot for cottage cheese chips. If you’re using a convection oven, reduce the temperature by 25°F to avoid over‑browning. The result is a golden exterior with a tender interior that’s easy to bite. The trick is to keep the oven preheated before placing the batter inside.
Why Your Nose Knows Best
Your nose is a reliable indicator of doneness. As the batter bakes, the aroma changes from mild dairy to a warm, nutty scent. When you smell a hint of toasted almond or a faint caramel note, the chips are almost ready. Trust that aroma; it’s the best cue for when to pull them out. If you wait too long, the chips will become overly dry; if you pull them early, they’ll be soggy. Listening to your senses will help you achieve that perfect crunch.
The 5‑Minute Rest That Changes Everything
After baking, let the chips rest on a rack for at least five minutes. This rest period allows the steam to escape and the structure to set. If you cut into the chips immediately, they’ll crumble. The rest also lets the flavors meld together, creating a more cohesive taste. I’ve seen people skip this step, and the result is a less satisfying bite. Give your chips that extra five minutes and enjoy the difference.
The Perfect Parchment Choice
Not all parchment paper is created equal. Use parchment with a high heat tolerance to avoid burning. If you’re using a reusable silicone mat, make sure it’s clean and free of debris. The surface should be smooth so the batter spreads evenly. A rough or dirty surface can cause uneven baking. The right parchment or mat ensures a consistent, professional finish.
The Secret to Even Spreading
Spreading the batter evenly is the cornerstone of uniform chips. Use a spatula to push the batter toward the edges, creating a uniform thickness. A slight tilt can help you gauge the evenness. If you notice any thick spots, smooth them out with the spatula. The goal is a sheet that looks like a thin pancake. Even spreading reduces the risk of soggy spots.
The Final Crunch Boost
Right before serving, give the chips a quick blast in a hot oven. A five‑minute bake at 350°F restores the crispness and adds a warm aroma. If you’re storing them, this step is essential to bring back the crunch. The chips will feel light and airy, ready for a fresh bite. This final touch turns a simple snack into an experience.
Alright, now that you have the insider tricks, it’s time to experiment. The next section will show you how to add your own flair to these chips. Whether you want to add spice, herbs, or even a sweet twist, the possibilities are endless.
Creative Twists and Variations
This recipe is a playground. Here are some of my favorite ways to switch things up: from sweet to savory, from mild to bold, and everything in between. These variations will keep your snack game fresh and exciting.
Smoky Chipotle
Add ½ tsp chipotle powder and a dash of smoked paprika to the batter for a smoky, spicy flavor. The chipotle adds heat, while the paprika gives a deep, earthy undertone. This version is perfect for those who love a little kick with their crunch. Serve with a cool yogurt dip to balance the heat. The combination of smoky and spicy is irresistible.
Herb Garden
Stir in a tablespoon of chopped fresh basil and a pinch of dried oregano. The herbs bring a fresh, green flavor that pairs beautifully with the tangy cheese. This version is great for spring or summer snacking. The herbs add a burst of color and aroma. Serve with a light vinaigrette for a refreshing twist.
Cheesy Parmesan
Mix in 2 tbsp grated Parmesan cheese and a pinch of nutmeg for a savory, cheesy flavor. The Parmesan adds depth, while the nutmeg gives a subtle warmth. This version is ideal for a quick pizza topping or a savory snack. The cheese melts into the batter, creating a richer texture. The result is a chip that feels like a mini pizza slice.
Sweet Cinnamon
Add 1 tsp cinnamon and a drizzle of honey to the batter for a sweet, warm flavor. The honey adds a natural sweetness that balances the cheese’s tang. This version is great for a dessert snack or a sweet breakfast treat. The cinnamon gives a comforting aroma. Serve with a dollop of Greek yogurt for a balanced bite.
Garlic Parmesan Finesse
Combine 1 tsp garlic powder, 1 tsp onion powder, 2 tbsp grated Parmesan, and a pinch of black pepper. This version amplifies the savory notes while adding a buttery richness. The Parmesan crisps up beautifully, creating a golden crust. It’s perfect for a party snack or a quick side dish. The combination of garlic and Parmesan is a classic that never fails.
Citrus Burst
Add the zest of one lemon and a splash of lemon juice to the batter for a bright, zesty flavor. The citrus zest adds a fresh aroma, while the juice provides a subtle tang. This version is ideal for a refreshing snack on a hot day. The lemon pairs wonderfully with the mild cheese. Serve with a sprinkle of sea salt for a balanced taste.
With these variations, you can keep the snack fresh and exciting for weeks. Each twist offers a new flavor profile that can cater to any mood or occasion. The base recipe is so versatile that you’ll find yourself experimenting more than ever.
Storing and Bringing It Back to Life
Fridge Storage
Place the cooled chips in an airtight container or a zip‑lock bag. Store them in the fridge for up to three days. The cool environment keeps the chips crisp and prevents mold growth. When you’re ready to eat, give them a quick reheat in the oven at 350°F for 5 minutes to restore the crunch. The chips should feel dry and crisp again, just like when they first came out of the oven.
Freezer Friendly
For longer storage, place the chips in a freezer‑safe bag or container. Freeze for up to two months. When you’re ready to enjoy them, thaw at room temperature for 20 minutes and then reheat at 350°F for 5 minutes. The chips will regain their crispness and flavor. Freezing is a great way to keep a batch on hand for busy days.
Best Reheating Method
The best way to reheat these chips is in a preheated oven at 350°F for 5 minutes. This method restores the crispness without over‑drying them. If you’re in a hurry, a quick microwave burst of 20 seconds can work, but be careful not to overcook. For a quick snack, simply let them sit at room temperature for a few minutes. The chips will soften slightly, making them easier to bite.
If you notice the chips have lost some crunch, add a tiny splash of water before reheating. This creates steam that helps them regain their crispness. The trick is to keep the water to a minimum; too much will make them soggy. The result is a snack that feels fresh, even after storage. With these storage tips, you can keep your chips ready whenever you crave a crunchy, protein‑rich treat.