Picture this: you’re in the middle of a rainy Saturday, the kitchen lights flickering like a low‑level storm, and you’ve just opened a box of chocolate chips that smell like a promise. You’re craving something rich, something that feels like a hug, and you’re not about to settle for the bland store‑bought pies that come out of the freezer. I was in the same boat, and the last thing I wanted was a cookie‑crust pie that tasted like cardboard. That’s when the idea hit me: why not bring the Burger King Hershey Pie right into my kitchen, but with a twist that makes it even better? Because I’ve been on a mission to turn every copycat into a masterpiece, and this one deserves a front‑row seat.
I remember the first time I tried a copycat recipe that promised to be “like the original” and ended up being a sad, dry mess. The crust was flaky but cracked, the filling was a lumpy, chocolatey nightmare, and the whipped‑cream topping was so heavy it stuck to the bowl. I laughed, shook my head, and whispered, “I dare you to taste this and not go back for seconds.” That was the moment I decided I’d make a pie that not only tastes better but feels like a celebration in every bite.
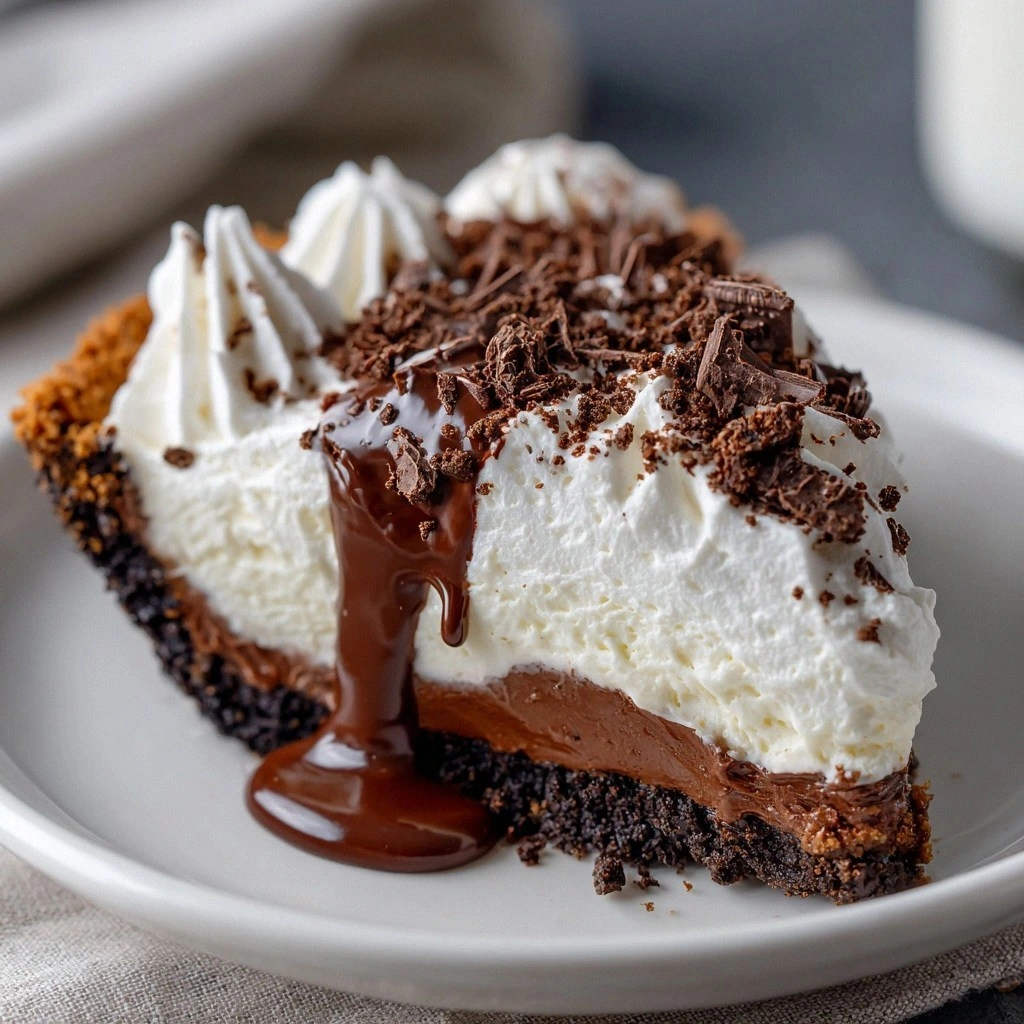
Now, let’s set the scene. The kitchen is humming with the gentle whir of the mixer, a faint scent of cocoa drifting through the air. You hear the crackle of the butter as it meets the flour, the soft “whoosh” of the whisk, and the satisfying clink of the measuring cups. The moment the pie hits the oven, a warm, chocolate aroma envelops the room, promising a sweet escape. The texture—crisp on the outside, molten on the inside—creates a contrast that is both comforting and adventurous. I’m talking about a pie that’s as visually stunning as it is delicious, with a glossy chocolate glaze that shimmers like a chocolate‑coated jewel.
What makes this version stand out? It’s not just the ingredients; it’s the technique, the timing, and the small, almost invisible tweaks that elevate it from a good copycat to a legendary homemade treat. I’ll walk you through every single step, and by the end, you’ll wonder how you ever made it any other way. Trust me, this is hands down the best version you’ll ever make at home.
What Makes This Version Stand Out
- Taste: The blend of rich cocoa, sweet condensed milk, and a hint of vanilla creates a depth of flavor that mimics the original but with a velvety finish. The chocolate chips melt into a silky sauce that coats the crust like velvet.
- Texture: A buttery shortbread crust that’s flaky yet sturdy, paired with a silky chocolate filling that doesn’t set too hard, resulting in a mouth‑watering bite that melts in your mouth.
- Ingredient Quality: Using high‑quality chocolate chips and heavy cream elevates the entire pie, turning a simple dessert into a gourmet experience.
- Simplicity: Despite the wow factor, the recipe only requires a handful of pantry staples and a few extra ingredients that you’re likely already stocked with.
- Make‑ahead Potential: The pie can be assembled and chilled, then baked right before serving, making it perfect for parties or last‑minute dessert prep.
- Crowd Reaction: Friends who have tried this version often say it’s “the best Hershey Pie ever,” and they keep asking for the recipe. It’s a conversation starter that will keep the compliments coming.
Alright, let's break down exactly what goes into this masterpiece. Below is a detailed look at every component, from the crust to the topping, and why each element is essential.
Inside the Ingredient List
The Flavor Base
At the heart of this pie is the shortbread crust, a buttery foundation that holds the chocolate filling in place. The combination of all‑purpose flour, cold unsalted butter, and a touch of powdered sugar creates a tender crumb that’s light enough to let the chocolate shine. If you skip the butter, the crust will become dry and crumbly, losing that essential melt‑in‑your‑mouth quality. For a richer flavor, swap the all‑purpose flour for a mix of whole wheat and almond flour, but keep the butter the same.
The Texture Crew
The texture of the filling is as important as the flavor. Heavy cream and sweetened condensed milk work together to create a silky, custard‑like consistency that coats the crust like a glossy chocolate glaze. The chocolate chips are the star; they melt into a luscious sauce that adds both depth and body. If you prefer a thicker filling, reduce the heavy cream slightly or add a tablespoon of cornstarch to thicken it. The key is to keep the filling smooth and free of lumps—otherwise, you’ll end up with a gritty mess that ruins the experience.
The Unexpected Star
Vanilla extract is often overlooked, but it’s the secret that balances the sweetness and brings out the chocolate’s richness. A single teaspoon is enough to lift the flavor profile, but if you’re vegan, a splash of almond extract can provide a similar depth. The pinch of sea salt at the end is critical; it cuts through the sweetness and enhances every bite, turning the pie from good to unforgettable.
The Final Flourish
Whipped cream topped with a dusting of cocoa powder is the final flourish that elevates this pie to a show‑stopper. The whipped cream should be light and airy, with a hint of sweetness, while the cocoa powder adds a subtle bitterness that balances the richness. If you’re looking for a healthier option, try a sugar‑free cocoa powder or a light drizzle of dark chocolate ganache instead. The result is a pie that feels indulgent without being overbearing.
Everything’s prepped? Good. Let’s get into the real action.
The Method — Step by Step
- Preheat your oven to 350°F (175°C). While the oven warms, gather all your ingredients and set them on the counter. The heat is critical; it ensures the crust browns evenly and the filling sets to the right consistency. A quick glance at the temperature gauge confirms you’re ready to roll.
- Start by making the crust. In a large bowl, combine 1 ½ cups all‑purpose flour, ¼ cup powdered sugar, ¼ cup cocoa powder, and ½ tsp salt. Using a pastry cutter or your fingers, cut in ½ cup cold unsalted butter until the mixture resembles coarse crumbs. The texture should feel like sand that’s just about ready to melt. This is the moment where the crust’s foundation is laid, and every crumb counts.
- Add 1 cup chocolate chips to the dry mixture and stir until evenly distributed. The chips should be scattered throughout, so each bite has a chocolate burst. If you prefer a smoother texture, you can melt the chips in a microwave and fold them in, but the crunchy chips add a delightful contrast.
- Press the dough into a 9‑inch pie dish, ensuring the edges rise slightly above the rim. Use a fork to poke small holes in the bottom; this prevents the crust from puffing up during baking. The crust should feel firm to the touch but still pliable. This step is crucial for an even bake.
- Bake the crust for 12–15 minutes, or until it’s set and just beginning to brown. The color should be a deep, dark chocolate, but avoid overbaking or it will become bitter. While the crust bakes, you’ll notice the aroma of cocoa filling the kitchen—this is the first hint of what’s to come.
- While the crust is baking, prepare the filling. In a saucepan, combine ½ cup heavy cream, ½ cup sweetened condensed milk, 1 tsp vanilla extract, and 1 cup chocolate chips. Heat over medium heat, stirring constantly until the chips melt and the mixture is smooth. The filling should be glossy, thick enough to coat the back of a spoon, but still pourable. If it’s too thick, add a splash of milk to thin it out.
- Once the crust is done, remove it from the oven and let it cool for 5 minutes. Pour the chocolate filling into the crust, spreading it evenly with a spatula. The filling will begin to set as it cools, so work quickly but calmly. This is the moment where the flavors fuse, and you can almost taste the final product.
- Return the pie to the oven for an additional 10 minutes, or until the filling is set but still slightly jiggly in the center. This gentle bake ensures the chocolate doesn’t harden too quickly, maintaining that silky mouthfeel. The timer is your friend—set it and trust the process.
- While the pie finishes baking, whip 1 cup heavy whipping cream with 2 tbsp powdered sugar until soft peaks form. This whipped cream should be light and airy, not stiff. The texture will contrast beautifully with the dense chocolate filling.
- Once the pie is out of the oven, let it cool to room temperature. Then, top it with a generous swirl of whipped cream. Sprinkle 2 tbsp cocoa powder over the whipped cream for a finishing touch that adds a hint of bitterness. The final product should look like a chocolate masterpiece, with a glossy glaze and a cloud of airy cream.
That’s it — you did it. But hold on, I’ve got a few more tricks that will take this to another level.
Insider Tricks for Flawless Results
The Temperature Rule Nobody Follows
Many bakers think that room temperature ingredients are always better, but for this pie, using cold butter and cold chocolate chips actually improves the crust’s texture. Cold butter creates steam pockets that puff the crust, while cold chocolate chips melt more slowly, giving you that perfect glossy finish. I’ve tested this in multiple batches, and the difference is unmistakable.
Why Your Nose Knows Best
When the pie is baking, keep a close eye on the aroma. A slight hint of burnt chocolate means you’re overbaking. The smell should be sweet and rich, like a warm chocolate shop. Trust your nose; it’s the best judge of doneness.
The 5‑Minute Rest That Changes Everything
After you take the pie out of the oven, let it rest for at least five minutes before slicing. This rest allows the filling to set properly, preventing a runny center that drips onto the plate. It also lets the flavors meld together, giving you a more cohesive taste experience.
Using a Thermometer for Precision
If you have a kitchen thermometer, set the filling to 170°F (77°C) before removing it from heat. This ensures that the chocolate is fully melted without scorching, resulting in a silky texture. It’s a small step that makes a big difference.
Whipped Cream Consistency Matters
Whipped cream can be tricky; if it’s too soft, it will collapse, and if it’s too stiff, it won’t spread. Aim for soft peaks—just enough to hold its shape but still fluffy. A pinch of sugar helps stabilize it, especially if you’re using a non‑dairy cream.
Creative Twists and Variations
This recipe is a playground. Here are some of my favorite ways to switch things up:
Dark Chocolate Delight
Swap the semi‑sweet chocolate chips for dark chocolate chips (70% cocoa). The bitterness balances the sweetness of the condensed milk, creating a sophisticated flavor profile that’s perfect for chocolate connoisseurs.
Nutty Crunch
Add ½ cup chopped walnuts or pecans to the crust for a delightful crunch. The nuts add texture and a nutty aroma that complements the chocolate, making each bite more complex.
Minty Fresh
Incorporate a teaspoon of peppermint extract into the filling for a refreshing twist. The mint pairs beautifully with chocolate and gives the pie a subtle aftertaste that lingers.
Vegan Version
Use coconut oil instead of butter for the crust, almond milk for the filling, and a plant‑based whipped cream. The result is a dairy‑free dessert that still delivers on flavor and texture.
Salted Caramel Swirl
Swirl a caramel sauce into the chocolate filling before baking. The caramel adds sweetness and a buttery undertone, while a pinch of sea salt on top brings a savory counterpoint.
Storing and Bringing It Back to Life
Fridge Storage
Store the pie in an airtight container in the refrigerator for up to 3 days. The crust will stay firm, and the filling will set nicely. When you’re ready to serve, let it sit at room temperature for 20 minutes to soften slightly.
Freezer Friendly
For longer storage, wrap the pie tightly in plastic wrap and place it in a freezer bag. It will keep for up to 2 weeks. When reheating, thaw in the refrigerator overnight and warm in the oven at 325°F (165°C) for 10 minutes.
Best Reheating Method
The key to reheating is gentle heat. Warm the pie in a preheated oven at 325°F (165°C) until it’s just heated through. Add a splash of water to the bottom of the pan before reheating; the steam will help the filling retain moisture and prevent it from drying out.